Design, Layout & Living Space
Natural light in a motorhome: how rooflights and windows transform van living

Written by
Felix
Felix covers campervan technology, layouts, and modern conversions, with a focus on design-led thinking and practical performance
The short answer
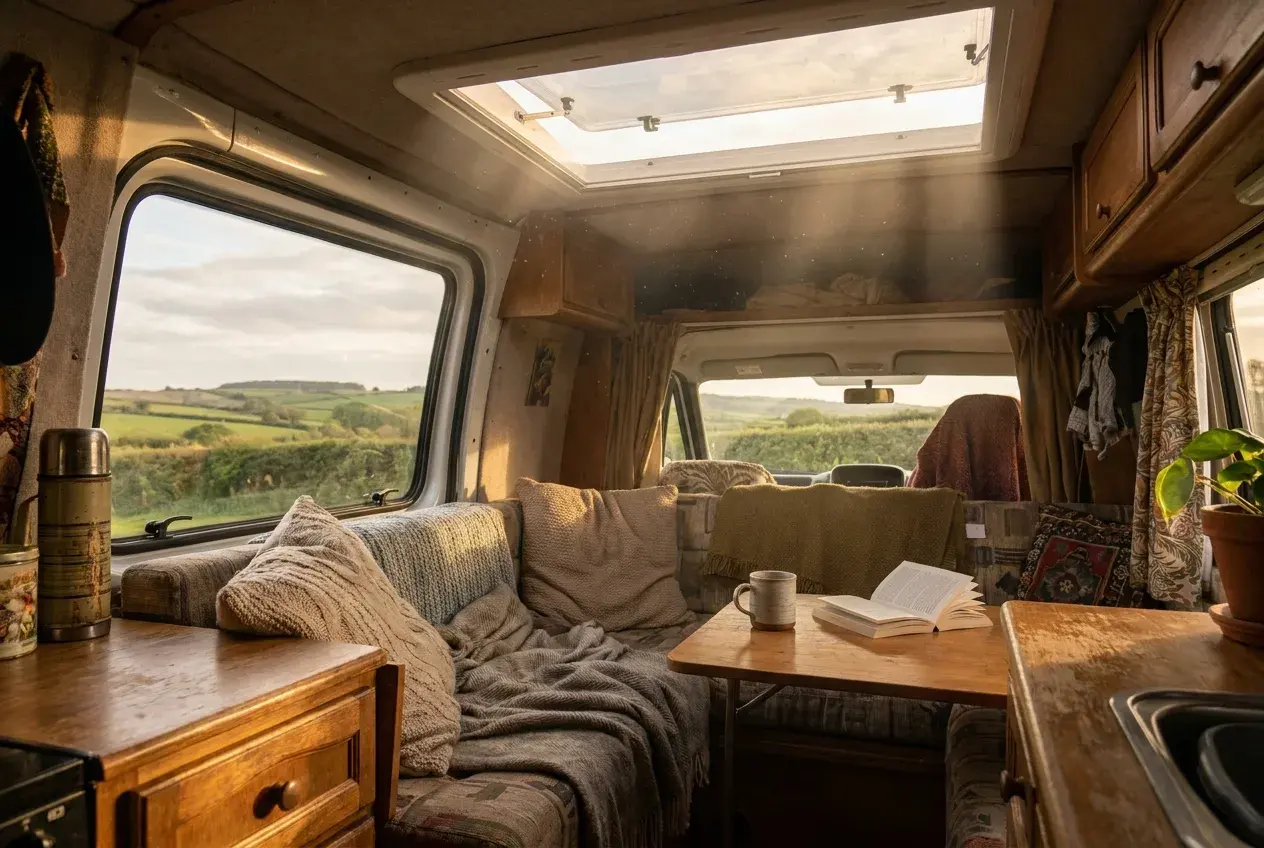
Natural light is what makes a small motorhome feel larger and calmer, and the best vans use rooflights and windows together. Rooflights bring overhead light that fills the centre of the room and make the space feel bigger, while windows give eye-level light and a view. Spread the openings along the van, place them where you actually sit, sleep and cook, and make sure every one can be shaded, blacked out and opened for ventilation.
Step into two motorhomes of exactly the same size and one will feel airy and calm while the other feels like a cupboard with a kettle in it. Most of the time, the difference is light. Not paint, not clever cabinets, not the size of the bed. Just how much daylight gets in, where it lands, and how the space glows on a grey afternoon in November.
Light is the thing people feel before they can name it. It is also the thing that gets skimmed over when you are reading a spec sheet full of berths, payload figures and engine sizes. That is a shame, because natural light is one of the cheapest and most powerful ways to make a small living space feel generous. Get it right and a four metre van feels open and restful. Get it wrong and even a big A-class can feel gloomy and a little oppressive.
This guide goes deep into the whole subject. We will cover the kinds of rooflights and windows you will actually meet in UK motorhomes and campervans, the glazing that matters, how placement changes the feel of a layout, and the real trade-offs around heat, glare, condensation, privacy and ventilation. We will talk money, mistakes and what to check before you buy or before you cut a hole in your own roof. By the end you should be able to walk into any van and read its light like a builder reads a wall.
Why natural light matters more than you think
Humans are wired to respond to daylight. We feel calmer, more awake and more comfortable in spaces that connect us to the sky and the world outside. In a house this is easy to take for granted because you have windows on several walls and a ceiling that is two and a half metres up. In a van you are working with a low roof, thick insulated walls and a footprint smaller than most bathrooms. Every bit of glass has to work hard.
There are three big reasons light deserves your attention.
It changes how big the space feels
A van with good light reads as larger than its measurements. When daylight comes from above through a rooflight, it removes the cave feeling you get from light that only enters at window height. Overhead light bounces off pale surfaces and fills the room evenly, which is exactly what makes a small space feel calm rather than cramped. This is why a modest panel van conversion with a big front rooflight can feel airier than a longer coachbuilt with small windows and dark wood.
It affects your mood and your day
Touring is supposed to be relaxing. A dim interior on a wet day quietly drags at you. A bright one lifts you. Morning light through an east-facing rooflight is one of the genuine pleasures of van life, the kind of thing owners mention again and again when they describe why they love their van. Light also helps you keep a sensible rhythm. You wake more naturally, you do not reach for the switch at three in the afternoon, and the evening feels like the evening.
It cuts your reliance on the electrical system
This is the practical one. Every hour you spend with the lights off because you do not need them is an hour your leisure battery is not working. On a short winter day this matters less, but across a sunny week of off-grid touring, good daylight genuinely reduces your power draw and your stress about it. Light is free until the sun goes down. A van designed to use it well is a van that asks less of its electrics.
Rooflights and windows do different jobs
Before we get into types, it helps to understand that overhead light and side light are not interchangeable. They do different things, and the best vans use both deliberately.
Rooflights bring in light from above. This is the most valuable light in a van because it spreads furthest, reaches the centre of the floor, and does not depend on what is parked next to you. It also gives you privacy by default, because nobody is looking down through your roof. Overhead light is the difference between a space that feels open to the sky and one that feels boxed in.
Windows bring in light at eye level and connect you to the view. This is the emotional light, the reason you sit at the dinette and watch the rain on the loch or the sheep on the hill. Windows also help you read the weather, see who is approaching, and feel part of the place you have parked. But window light is lower, more directional, and easily blocked by hedges, other vehicles or the angle of the sun.
The takeaway is simple. Rooflights make a van feel bigger and brighter. Windows make it feel connected and homely. You want both, and you want them placed so they cover the spots where you actually spend time.
The main types of rooflights
Rooflights, sometimes called roof vents or skylights, come in a few clear families. Knowing them helps you read any spec sheet and judge whether a van has been fitted out thoughtfully.
The classic hinged rooflight
This is the most common type in UK and European motorhomes. It is a rectangular acrylic dome set in a frame, hinged so it props open at the back or sometimes on multiple positions. Sizes are usually quoted as the cut-out, with 400 by 400mm being the everyday workhorse and 700 by 500mm or larger being the panoramic versions.
The bigger units, often described as panoramic rooflights, transform a living area. A large rooflight over the lounge floods the space with overhead daylight and feels almost like a sunroof. Many come with a tinted dome to cut glare, an integrated flyscreen, and a pleated blackout blind built into the frame. The better ones let you crank them open on a winder for ventilation while staying rain resistant when only partly open.
The powered roof fan unit
These look like a rooflight but their main job is air movement. They have a powered fan that can pull stale air out or push fresh air in, with multiple speeds and often a rain sensor that closes the lid automatically. They still let light in, especially the clear-lidded versions, but the dome is usually smaller than a panoramic rooflight. People fit these over kitchens and bathrooms where extraction matters, and over the bed for sleeping airflow on warm nights. If you cook indoors or shower in the van, a powered extraction unit earns its place.
The fixed skylight or sunroof panel
Some conversions, particularly design-led panel van builds, use a fixed or pop-up glazed panel purely for light rather than ventilation. A long, slim fixed skylight running down the centre of the roof can pour light into a galley without the bulk of an opening unit. The downside is no ventilation and a fixed weak point, so these are chosen for effect and need careful sealing.
The pop-top roof
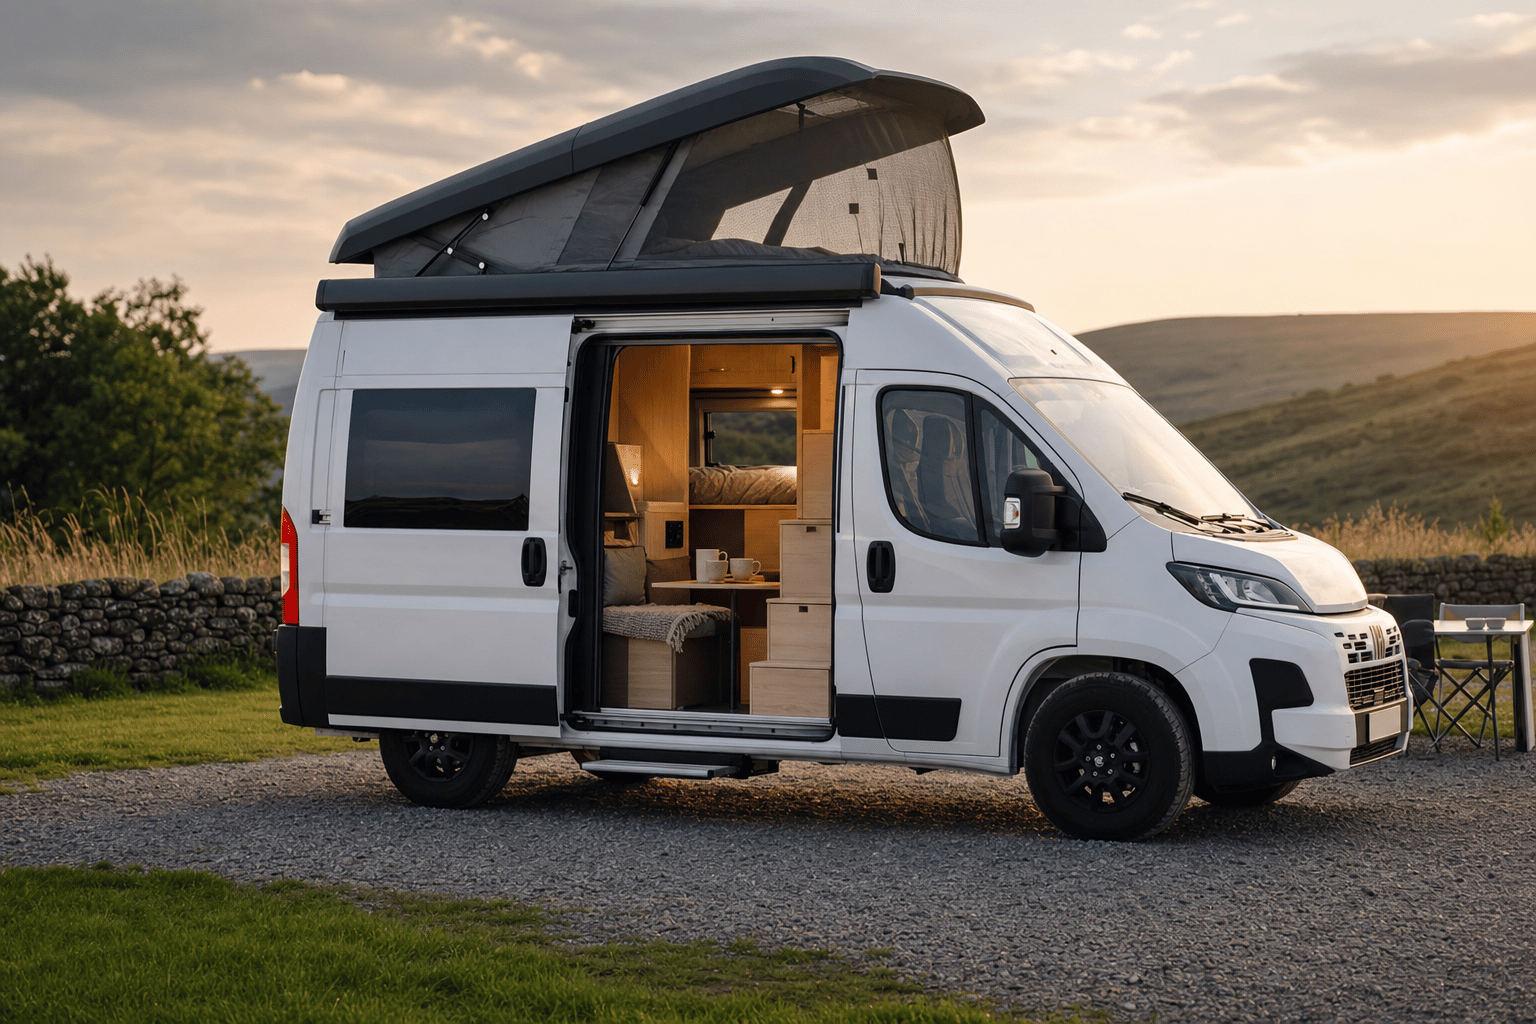
On smaller campervans the elevating roof is its own kind of rooflight. When the canvas sides include windows or mesh panels, raising the roof floods the van with light and air in a way no fixed unit can match. Many pop-tops have two or three zipped windows in the canvas, which turn a small van into something that feels like a tent and a flat at the same time. The trade-off is that the light only arrives when the roof is up, so on a cold wet day with the roof down you are back to the fixed glazing.
The main types of windows
Windows in motorhomes are a different world from house windows, and the differences matter for both light and living.
Acrylic double-glazed windows
The standard fit in the vast majority of coachbuilt motorhomes and many campervans is the framed acrylic double-glazed window. These are tinted, lightweight, and have two layers of acrylic with an air gap, which gives a degree of insulation and reduces condensation compared with single glazing. Most come as a unit with a pleated blackout blind and a flyscreen built into a combined pull-down cassette, so you can have full light, partial shade, full blackout or just the screen for bugs.
The tint is worth understanding. It cuts glare and heat and gives you daytime privacy, but it also darkens the interior view slightly and makes the world outside look a touch grey. On a bright day you barely notice. On a dull day, heavily tinted glass can make a van feel darker than its window area suggests.
Bonded glass windows
Many panel van conversions, and some higher-end coachbuilts, use bonded automotive-style glass. These are flush-fitted tinted glass panels glued directly to the bodywork, the same way a van's factory windows are fitted. They look sleek and modern, follow the curve of the body, and give a cleaner exterior. The trade-off is that most bonded windows are fixed or only have a small opening section, and they are usually single glazed, so they are colder and more prone to condensation than framed acrylic units. They also need separate blinds rather than a built-in cassette.
Opening versus fixed
Windows that open are worth a lot for ventilation and for that connection to the outside, the sound and smell of where you are. Top-hinged opening acrylic windows that prop out a few centimetres let air in even in light rain. Fixed windows are cheaper, simpler and leak-resistant, but they are dead air. A good layout mixes them, with openers where you sit and sleep and fixed glass where you only want light and view.
The cab and rear doors
Do not forget that the base vehicle already gives you a lot of glass. The windscreen on a motorhome is enormous and brings in a flood of light, which is why so many vans feel bright when you swivel the cab seats and use the front as a lounge. Rear barn doors with windows, and the sliding side door window on a panel van, all add to the light budget. The best conversions treat these factory windows as part of the lighting design rather than ignoring them.
Glazing, tint and the quality of the light
It is easy to think of light as just quantity, but the quality matters too. The same square metre of glass can give you bright even light or a harsh hot patch depending on the glazing.
Tint level
Tinting reduces glare and solar heat gain and improves daytime privacy. In the UK climate a moderate tint is usually the sweet spot, enough to take the edge off summer glare without making a dull day gloomy. Very dark privacy glass looks great in a brochure photo on a sunny coast but can feel oppressive in British winter light. If you are choosing a conversion, look at the interior on an overcast day, not just in showroom lighting.
Double versus single glazing
Double-glazed acrylic is warmer and far less prone to running with condensation on a cold morning. Single-glazed bonded glass looks cleaner but you will wipe water off it on frosty nights. Neither is wrong, but they suit different uses. If you tour in winter or live in the van for long stretches, the thermal performance of double glazing is a real comfort upgrade, not just a number.
Diffused versus clear
Some rooflights and skylights use frosted or diffused acrylic that spreads light softly without a harsh sunbeam. Others are clear, giving you a view of the sky and stars but also a hot bright patch when the sun is overhead. Diffused light is gentler for a living area. Clear glass is lovely over a bed if you like falling asleep under the stars, just be ready to use the blind on sunny mornings.
How light changes the feel of a layout
This is where it gets interesting, because light interacts with the floor plan. The same rooflight in a different spot does a completely different job.
The lounge and dinette
This is where you spend evenings, eat, read and relax, so it deserves the best light. A large panoramic rooflight over the lounge is the single most transformative thing you can add to a living area. Combined with windows on both sides at seat height, it creates a bright, even, sky-lit room that feels far larger than its footprint. If a van has a dark lounge, no amount of clever cabinetry will fix the feeling.
The kitchen
Cooking needs task light and ventilation. A rooflight or powered fan unit directly over the hob does two jobs, lighting the worktop and pulling out steam and cooking smells. A window over the sink is a classic for a reason, it gives you something to look at while you wash up and lets you vent moisture. A dark galley is not just gloomy, it is genuinely harder to cook safely in.
The bed area
Light over the bed is a personal choice. Some people love a rooflight above the pillows for stargazing and morning light. Others find they wake too early in summer and prefer the bed in a calmer, dimmer corner. A rooflight over the bed should always have a good blackout blind, because UK summer dawns arrive very early and a clear roof over your face at half four in the morning is a quick way to never sleep past five again. Ventilation over the bed, on the other hand, is almost always welcome.
The bathroom
A small rooflight in the washroom is worth more than its size suggests. It brings in light so you are not relying on a switch, and crucially it vents the moisture from showering, which is the single biggest source of damp in a van. A bathroom with no rooflight and no window is a damp problem waiting to happen. If you can have just one extraction point in the whole van, the bathroom is a strong candidate.
The hallway and centre of the van
The middle of a long coachbuilt, away from the windows and the windscreen, is the darkest spot. A rooflight here rescues an otherwise gloomy through-route and stops the back of the van feeling like a separate, darker world. Designers who understand light put a unit roughly central to break up the length and keep the whole van feeling connected.
Placement: the difference between bright and brilliant
Where light enters matters as much as how much of it there is. A few principles separate a well-lit van from a merely glassy one.
Spread it out
Two medium rooflights spread along the van give more even, usable light than one big one in a single spot. Even light feels calm. A single bright patch with dark corners feels patchy and actually makes the dark bits look darker. The same applies to windows. Glass on both sides of the living area balances the light so you do not get a bright side and a shadow side.
Light the centre, not just the edges
Windows light the perimeter. Rooflights light the middle. A van with lots of windows but no rooflights can still feel dim in the core of the room because the light never reaches the centre of the floor. Overhead light is what fills the room. This is the most common thing people get wrong when they imagine that more windows alone will brighten a van.
Think about what you park next to
Side windows are at the mercy of your neighbours. Park beside a tall hedge, a wall or another big van and your side light is gone. Rooflights do not care. They keep working whatever is beside you, which is one more reason overhead light is the more reliable investment for a van that will be used in real, crowded campsites and aires.
Follow the sun and your routine
If you can choose, light where you do things at the time you do them. East-facing light over a breakfast nook is lovely. West-facing glass over the evening lounge catches the sunset. You will not always be able to park to suit, but on a build you can at least make sure the spaces you use most have the most generous glass.
The downside nobody mentions: heat and glare
More glass is not always better. Light brings heat, and a van is a small, sealed metal box that warms up fast. On a hot day a south-facing van with big rooflights and untinted glass can become uncomfortable quickly. This is the trade-off you balance.
Solar gain
Glass lets in solar radiation that heats the interior. In a UK summer this can be welcome in May and miserable in a July heatwave. Tinted glazing, reflective external covers and good blinds all help. So does cross-ventilation, which we will come to. The point is that you should not chase maximum glass without a plan for shading it, or you will spend hot afternoons chasing shade and opening everything.
Glare
Direct sun through a clear rooflight can be blinding when it lands on a screen, a worktop or your face. Diffused glazing softens this. Adjustable blinds fix it. A clear rooflight over the lounge with no blind is a design flaw, not a feature, because you cannot use the space when the sun is on it.
The winter flip side
In winter the same glass that overheats you in summer also loses heat fast at night. Glass is a poor insulator compared with an insulated wall. A van with a lot of single-glazed bonded glass will feel colder and cost more to heat in winter than one with less glass or double glazing. This is not a reason to avoid windows, it is a reason to insulate the rest of the van well and to use thermal blinds and external screens when it is cold.
The best-lit vans are not the ones with the most glass. They are the ones where every piece of glass can be controlled, shaded, opened and blacked out as the day and the season demand.
Condensation and thermal performance
Light and moisture are linked, because both rooflights and windows are where warm damp air meets cold surfaces. Understanding this saves you from the most common and most expensive problem in motorhomes, which is damp.
Why glass attracts condensation
Inside your van the air holds moisture from breathing, cooking and showering. When that warm moist air touches a cold surface, the moisture condenses into water. Glass and the metal frames around rooflights and windows are the coldest surfaces in the van, so they are where water appears first. You will see it as misted windows and droplets around frames on a cold morning.
How glazing choice helps
Double-glazed acrylic windows stay warmer on the inside surface, so they condense far less than single glazing. Rooflights with thermal frames and good seals do the same. This is a genuine comfort and health benefit, not just a spec line. Less condensation means less wiping, less damp bedding near windows, and a much lower risk of long-term damp damage to surrounding woodwork.
The role of ventilation
You cannot eliminate moisture, you have to let it out. This is why fixed background ventilation matters and why opening a rooflight a crack while you cook or sleep dramatically reduces condensation. A van that is sealed tight with no airflow will run with water every cold morning regardless of how good the glazing is. Light and ventilation work together, which is why so many of the best openings do both jobs.
Blinds, blackout and privacy
Light you cannot control is a problem. The systems that let you dial light up and down are as important as the glass itself.
Built-in cassette blinds
Most framed acrylic windows and many rooflights come with an integrated cassette that holds a pleated blackout blind and a flyscreen. You pull one down for shade and blackout, the other up for bugs, and you can meet them in the middle for partial shade with ventilation. These are neat, reliable and the standard for good reason. The blackout on quality units is genuinely dark, which matters for sleep in summer.
Rooflight blinds
Panoramic rooflights usually have a pleated blind built into the frame that you slide across. Check it is a proper blackout fabric and that it covers fully, because a rooflight over the bed with a leaky blind will wake you at dawn. The better units have a flyscreen on a separate slide so you can have the dome open for air with the bugs kept out and the blind set wherever you like.
Thermal screens
For cold weather, external windscreen covers and internal thermal blinds for the cab and habitation windows make a big difference. The cab is a huge glass area and a major heat loss point, so a fitted external silver screen over the windscreen and cab windows pays for itself in comfort and heating fuel on winter trips. These also add privacy and security, blocking the view in completely.
Privacy without darkness
Tinted glass gives daytime privacy because it is darker outside looking in than inside looking out, in daylight. At night this reverses, your lit interior is on full display, so you need blinds. The trick is wanting privacy without losing all your light, which is where partial blinds, frosted lower windows in bathrooms and clever placement come in. You can have a high rooflight giving light while the lower windows are blinded for privacy.
Ventilation: light's essential partner
You cannot talk about openings without talking about air, because in a van they are usually the same holes. Good light and good air come together.
Cross-ventilation
The most effective cooling and moisture control comes from air moving through the van, in one opening and out another. A rooflight open at the back and a window open at the front create a flow that pulls heat and moisture out. On a warm night, a rooflight over the bed plus a cracked window gives you airflow without a fan. Design your openings so you can always create a path for air, not just let it sit.
Powered extraction
Where natural flow is not enough, a powered roof fan moves serious volumes of air. Over a kitchen it clears steam and smells. Over the bed it keeps you cool on still summer nights. The good ones are quiet, have a rain sensor that closes them automatically, and run happily off your leisure battery for hours on a low speed. If you cook and shower in the van regularly, a powered unit is one of the better upgrades you can make.
Background ventilation
UK motorhomes are required to have fixed background ventilation, the small fixed vents low and high in the van, for safety reasons around gas appliances and to prevent the build-up of moisture and fumes. Never block these. They are part of why the van stays healthy, and they work alongside your openable light sources. If you ever find yours taped over by a previous owner, that is a red flag worth investigating.
Retrofitting rooflights and windows
Plenty of owners add light to a van they already have, either to a panel van conversion in progress or to brighten an older motorhome. It is very doable, but it involves cutting holes in your vehicle, so respect the job.
What is involved
Fitting a rooflight means cutting a square hole in the roof, fitting a frame top and bottom, sealing it thoroughly and clamping it down. Fitting a window means cutting the side panel, often through a strengthening section, and either clamping a framed unit or bonding glass with automotive adhesive. Both are within reach of a competent DIYer with the right tools and patience, but both are unforgiving if you rush the sealing.
The risks to respect
- Sealing. A poorly sealed opening leaks, and a leak in a van rots woodwork and creates damp that can quietly ruin the interior. This is the single most important part of the job. Use the correct sealant, follow the fitting instructions exactly, and check it after the first few rainy trips.
- Structure. Cutting a large hole removes strength. On a roof you usually need to keep some structure or reinforce around a big rooflight. Manufacturers specify maximum sizes and reinforcement for a reason.
- Roof thickness. Rooflights are sold for a range of roof thicknesses. The acrylic frame must match your panel and insulation depth or it will not clamp correctly. Measure before you order.
- Wiring and gas. Before you cut, know what is behind the panel. Roof wiring, solar cables and the routes of gas pipes must be avoided. Cutting blind into a panel is asking for trouble.
When to pay a professional
If you are not confident with sealing or cutting, or the van is valuable and you cannot afford a leak, pay a habitation specialist. The cost of a clean professional fit is small next to the cost of repairing damp damage. Many owners happily fit a small rooflight themselves and pay someone to fit a big panoramic unit or a bonded window, which is a sensible split.
What it costs
Prices move around, but here is an honest sense of UK figures so you can budget. Treat these as ballpark ranges rather than quotes.
- Standard 400 by 400mm hinged rooflight: roughly £60 to £150 for the unit, more for premium versions with blind and flyscreen built in.
- Panoramic rooflight with blind and flyscreen: roughly £150 to £350 for the unit.
- Powered roof fan with rain sensor: roughly £150 to £400 depending on speeds, sensor and build quality.
- Framed acrylic double-glazed window with cassette blind and flyscreen: roughly £100 to £300 depending on size.
- Bonded tinted glass window: the glass itself can be modest, but bonding kits, primers and the skill needed push the real cost up, and professional fitting is common.
- Professional fitting: commonly £100 to £300 per opening depending on complexity, more for large or bonded units.
The bigger point is that light is one of the better-value upgrades in a van. A few hundred pounds spent on a panoramic rooflight over a dark lounge changes how the whole van feels, every single day you use it. Compared with the cost of moving up to a longer van for more space, buying light is cheap.
Reading the light when you view a van
When you are looking at a van to buy, used or new, here is how to judge its light properly rather than being dazzled by a sunny forecourt.
View it on a dull day if you can
Showroom lighting and bright sun flatter everything. The real test is how a van feels at four o'clock on a grey afternoon. If it still feels reasonably bright with the lights off, the glazing is doing its job. If you instinctively reach for the switch, note where the dark spots are.
Stand in the dark corners
Walk to the centre of the van, the part furthest from the windscreen and the windows. Is there overhead light there? In a long coachbuilt, check the area between the lounge and the bedroom. That is usually the gloomiest spot and tells you whether the designer thought about light or just bolted in the minimum.
Work every blind and screen
Pull down every cassette, slide every rooflight blind, open every opener. Check the blackout is genuinely dark over the bed. Check blinds run smoothly and the fabric is not perished, because replacing a sun-rotted cassette blind is fiddly and not always cheap. On older vans, faded yellow acrylic and crazed rooflights are common and worth factoring into the price.
Look for damp around openings
Every rooflight and window is a potential leak. Look and feel around the frames inside for soft spots, staining, a musty smell or fresh-looking sealant that might be hiding a repair. A damp meter reading around openings during a habitation check is worth its weight. Light is lovely, but a leaking opening is the most expensive way to get it.
Check the tint suits you
If you tour in winter or in the north, very dark privacy glass can make the interior feel gloomy on short grey days. If you mostly go in summer and value privacy, a darker tint is a benefit. Match the glass to how and when you will actually use the van.
Common mistakes people make with light
After looking at and living in a lot of vans, the same errors come up again and again. Avoid these and you are most of the way there.
Assuming more windows equals more light
Windows light the edges, not the middle. A van can have plenty of side glass and still feel dim in the core because nothing lights the centre of the floor. Overhead light from rooflights is what fills a room. If a van feels dark despite lots of windows, it almost always lacks rooflights.
Ignoring the dark centre
The middle of a long van, away from the cab and the windows, is the natural dark spot. Builders who forget this leave a gloomy through-route. A central rooflight fixes it cheaply. Walk the centre of any van and you will spot whether this was considered.
Chasing glass with no plan to control it
Big clear rooflights look stunning until July, when the lounge is a greenhouse you cannot sit in by midday. Light you cannot shade, dim or black out is a liability. Every opening needs a blind, a screen or a tint, and ideally a way to ventilate while shaded.
Forgetting winter
Single-glazed bonded glass looks sleek but runs with condensation and loses heat on cold nights. If you tour in winter, this matters. Plan for thermal screens, double glazing where you can, and good insulation everywhere that is not glass.
Blocking the ventilation
People sometimes tape over background vents to stop draughts, then wonder why the van runs with damp and smells musty. Those vents are doing a job. Light and air go together. Do not seal yourself in.
Putting a clear rooflight over the bed with a weak blind
UK summer dawns are brutally early. A clear roof over your face plus a thin blind equals waking at half four for months. Either choose diffused glazing, fit a proper blackout, or place the bed away from the brightest overhead light.
Putting it all together: a balanced light plan
So what does good look like? Here is the shape of a well-lit van, whether you are buying or building.
- A large rooflight over the main living area to flood the lounge with overhead light and make the whole van feel bigger. Tinted or diffused, with a proper blackout blind and a flyscreen.
- Windows on both sides of the lounge at seat height, double-glazed with cassette blinds, at least one of them an opener, to balance the light and connect you to the view.
- A rooflight or powered fan over the kitchen to light the worktop and pull out steam and smells, with a window over the sink if the layout allows.
- A rooflight in the bathroom for light and, more importantly, moisture extraction. The single best place to put a vent if you can only have one extra.
- Ventilation over the bed for warm nights, with light there as a personal choice and a serious blackout blind if you choose a clear unit.
- A central rooflight in a long van to rescue the dark middle and keep the whole space feeling connected.
- Thermal screens for the cab and good blinds throughout, so you can turn the light down, keep heat in, and have privacy at night.
You do not need all of this in every van, and a small campervan with a big pop-top and a couple of windows can feel wonderfully light with very little fixed glass. The principle scales. Light the centre, balance the sides, control everything, and pair light with air.
Light and the electrical system
It is worth a short word on how natural light interacts with the rest of your van. Good daylight reduces how much you lean on your 12V lighting, which on a sunny off-grid week is a real saving on your leisure battery. Powered roof fans do draw power, but a quality unit on a low speed is very modest and can run for many hours on a battery topped up by even a small solar panel. Solar and rooflights share the roof, so when you plan one, plan the other, because you do not want a panel shading a rooflight or a rooflight stealing the space a panel needed. The best roofs are laid out with both in mind from the start.
Maintaining your rooflights and windows
Light costs almost nothing to run, but the hardware needs a little care to keep working and watertight.
Clean the acrylic correctly
Acrylic domes and windows scratch easily and craze if treated with the wrong cleaner. Use plenty of clean water and a soft cloth, avoid grit, and use a cleaner made for acrylic rather than harsh solvents or abrasive pads. Scratched, hazy acrylic loses clarity and looks tired, and it cannot be polished back as easily as you might hope.
Check seals every year
Sealant around openings is the front line against damp. Inspect it as part of an annual look-over or habitation check. Look for cracks, gaps, lifting edges and any sign of water staining inside. Catching a failing seal early is a five-minute job. Catching it late is a major repair.
Keep blinds and screens running freely
Cassette blinds and flyscreens run on small springs and channels that get gritty and stiff. Keep them clean, do not force them, and replace perished fabric before it jams. A blind that no longer holds tension or blacks out is worth fixing, because losing light control undoes a lot of the comfort.
Watch for UV ageing
Years of sun yellows and embrittles acrylic, especially on older vans. A rooflight dome that has gone brittle can crack, and a cracked dome leaks. Replacement domes are usually available for common units and are far cheaper than dealing with the water damage a failed one causes.
The bottom line
Natural light is the quiet hero of van living. It is the thing that makes a small space feel like somewhere you want to be, that lifts a grey day, that saves your battery, and that you feel the moment you step inside even if you cannot name it. Rooflights bring the overhead light that fills a room and makes it feel bigger. Windows bring the eye-level light and the view that makes it feel like home. The best vans use both, spread out, placed where you actually spend time, and controllable with blinds, screens and tints so you are master of the light rather than at its mercy.
When you are choosing a van, judge its light on a dull day, stand in its dark corners, work every blind, and check every opening for damp. When you are building or upgrading, light the centre, balance the sides, pair every opening with ventilation, and seal everything properly. Respect the trade-offs around heat, glare and winter cold, and plan for them rather than ignoring them.
Do that and you will end up with a van that feels twice its size, costs less to run on a sunny week, and is simply nicer to live in. Light is one of the cheapest luxuries in a motorhome and one of the most rewarding. Once you start reading it, you will never look at a van the same way again.
Common questions
Do rooflights or windows make a motorhome feel brighter?
Rooflights do the heavy lifting. Overhead light spreads furthest, reaches the centre of the floor and does not depend on what is parked beside you, which is what makes a van feel bigger and brighter. Windows light the edges and give you the view, so the best vans use both: rooflights to fill the room and windows to connect it to the outside.
Why does my motorhome feel dark even though it has lots of windows?
Because windows only light the perimeter, not the middle. The centre of the floor, especially in a long coachbuilt, stays dim unless a rooflight lights it from above. If a van feels gloomy despite plenty of side glass, it almost always lacks overhead light from rooflights.
Is double glazing worth it in a motorhome window?
For winter touring or living in the van, yes. Double-glazed acrylic stays warmer on the inside surface, so it runs with far less condensation than single-glazed bonded glass and loses less heat on cold nights. Bonded glass looks sleeker but you will wipe water off it on frosty mornings.
Should I put a rooflight over the bed?
It is a personal choice. A rooflight over the bed is lovely for morning light and stargazing, but UK summer dawns arrive very early, so fit a proper blackout blind or choose diffused glazing, or you will wake at half past four for months. Ventilation over the bed, on the other hand, is almost always welcome.
How much does it cost to fit a rooflight in a campervan?
As a rough UK guide, a standard 400 by 400mm hinged rooflight is around 60 to 150 pounds for the unit, a panoramic rooflight with blind and flyscreen around 150 to 350 pounds, and a powered roof fan around 150 to 400 pounds, with professional fitting commonly 100 to 300 pounds per opening. Light is one of the better-value upgrades in a van.
Why do motorhome windows get condensation, and how do I reduce it?
Glass and metal frames are the coldest surfaces in the van, so warm moist air from breathing, cooking and showering condenses on them first. Double glazing keeps the inner surface warmer so it condenses less, and ventilation, such as cracking a rooflight while you cook or sleep, carries the moisture out. Never block the fixed background vents.
Enjoyed this post?
Get more honest campervan guides like this one in your inbox.
You’re in!
Check your inbox. We’ve just sent you a welcome email.

About the author
Felix
Felix covers campervan technology, layouts, and modern conversions, with a focus on design-led thinking and practical performance
Keep Reading
Related Reading
Thoughtful articles that build on what you’ve just read.
Design, Layout & Living Space
20 min read
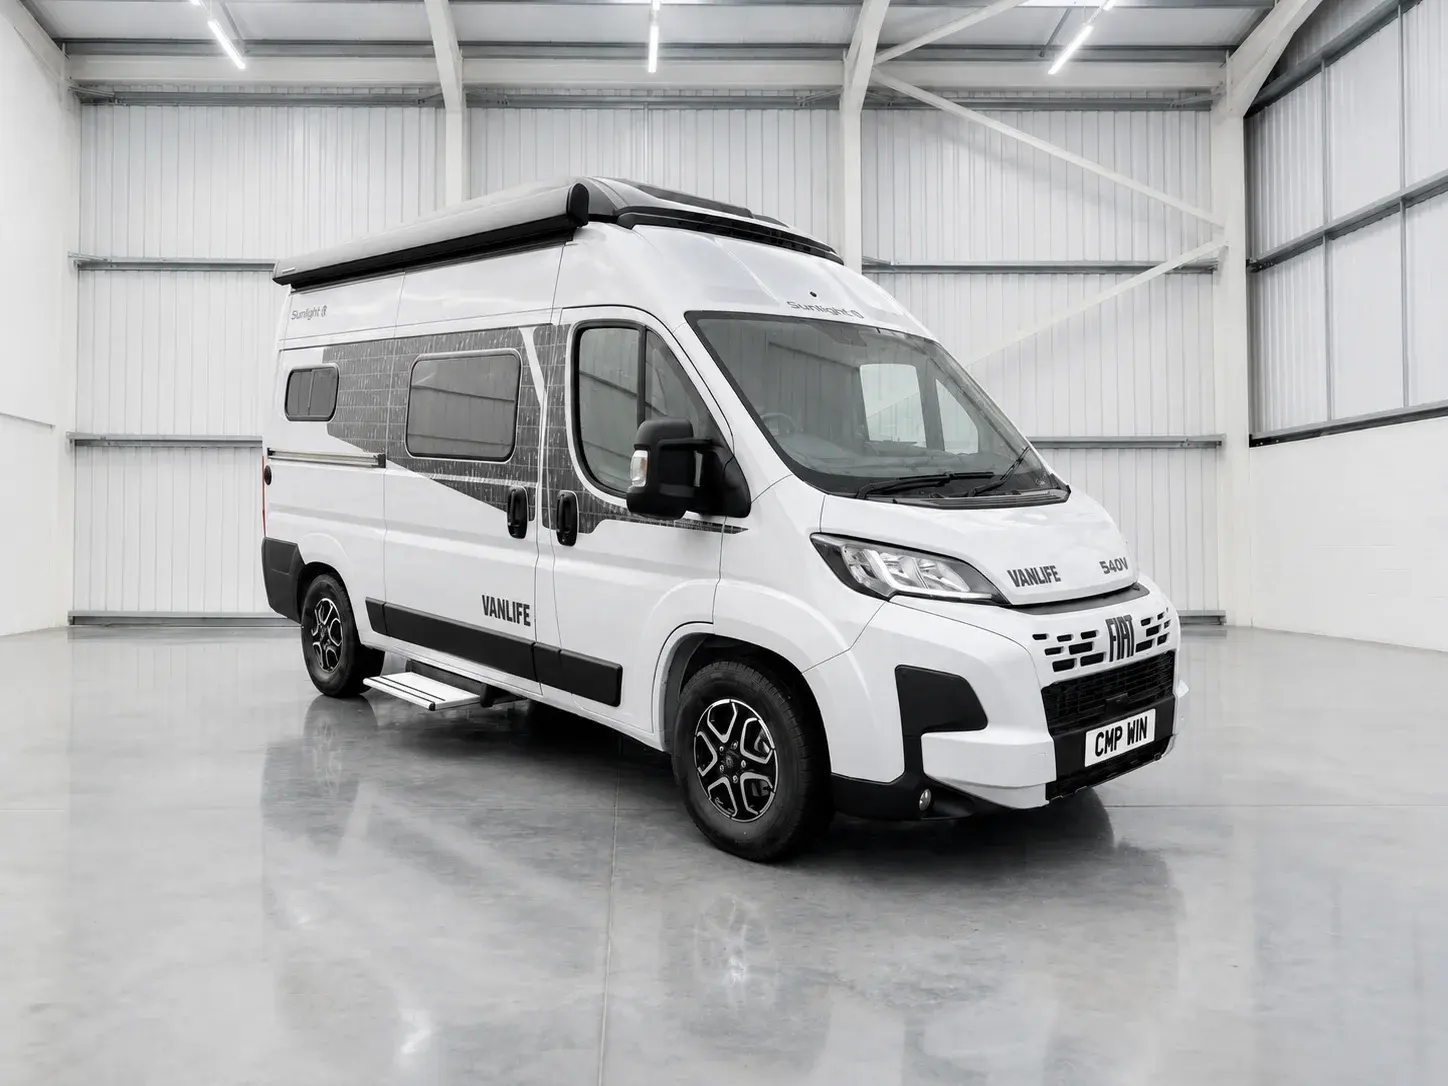
The clever staircase: how the Sunlight Vanlife 540 lives like a small flat
Most compact campervans force you to choose between a fixed bed and a proper living space. The Sunlight Vanlife 540 refuses the choice with one unusual idea: a permanent staircase up to the bed, which frees the whole rear of the van for a lounge. Here's why it works so well.
Design, Layout & Living Space
17 min read
Van flares and space pods: which to choose, not whether to buy
If your van is too narrow to sleep across, flares are the clever fix: moulded panels that widen the body just enough for a crossways bed, freeing up your whole floor. The real question isn't whether to fit them, it's which ones, how deep, and on which side. Here's the honest guide.
Design, Layout & Living Space
25 min read
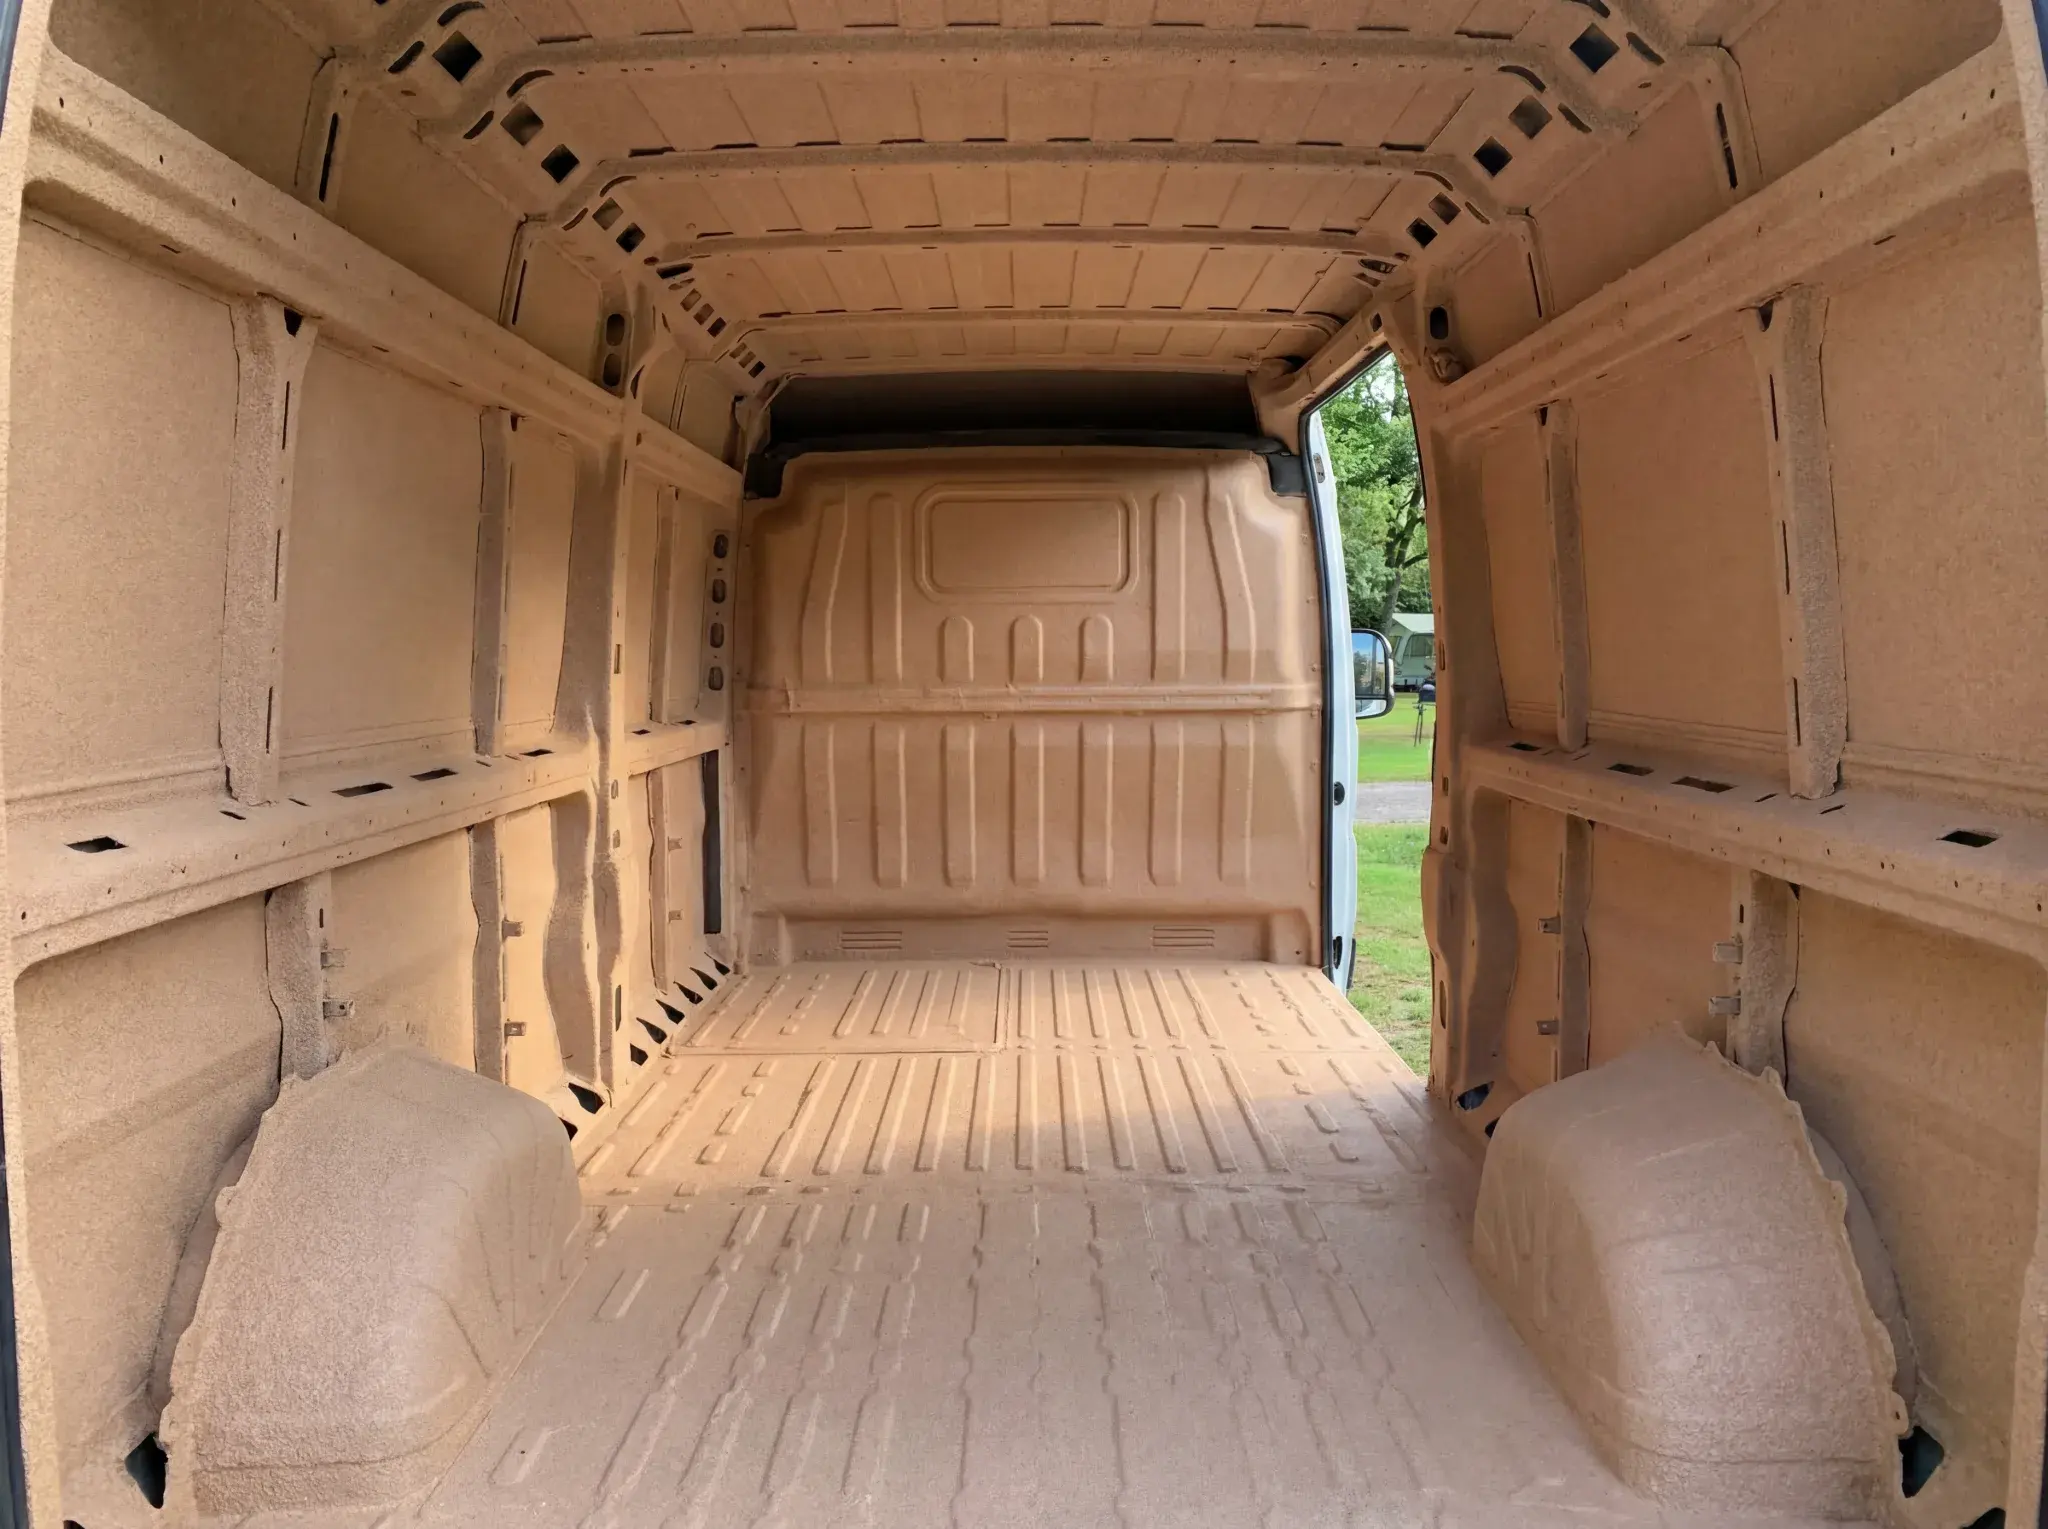
Corkon and spray cork: the honest guide to cork van insulation
Sprayed cork like Corkon is having a moment in van builds, and for good reason. But it's not the insulation a lot of people think it is. Here's the honest guide to what cork does brilliantly, what it doesn't, and how to use it well.
Design, Layout & Living Space
15 min read
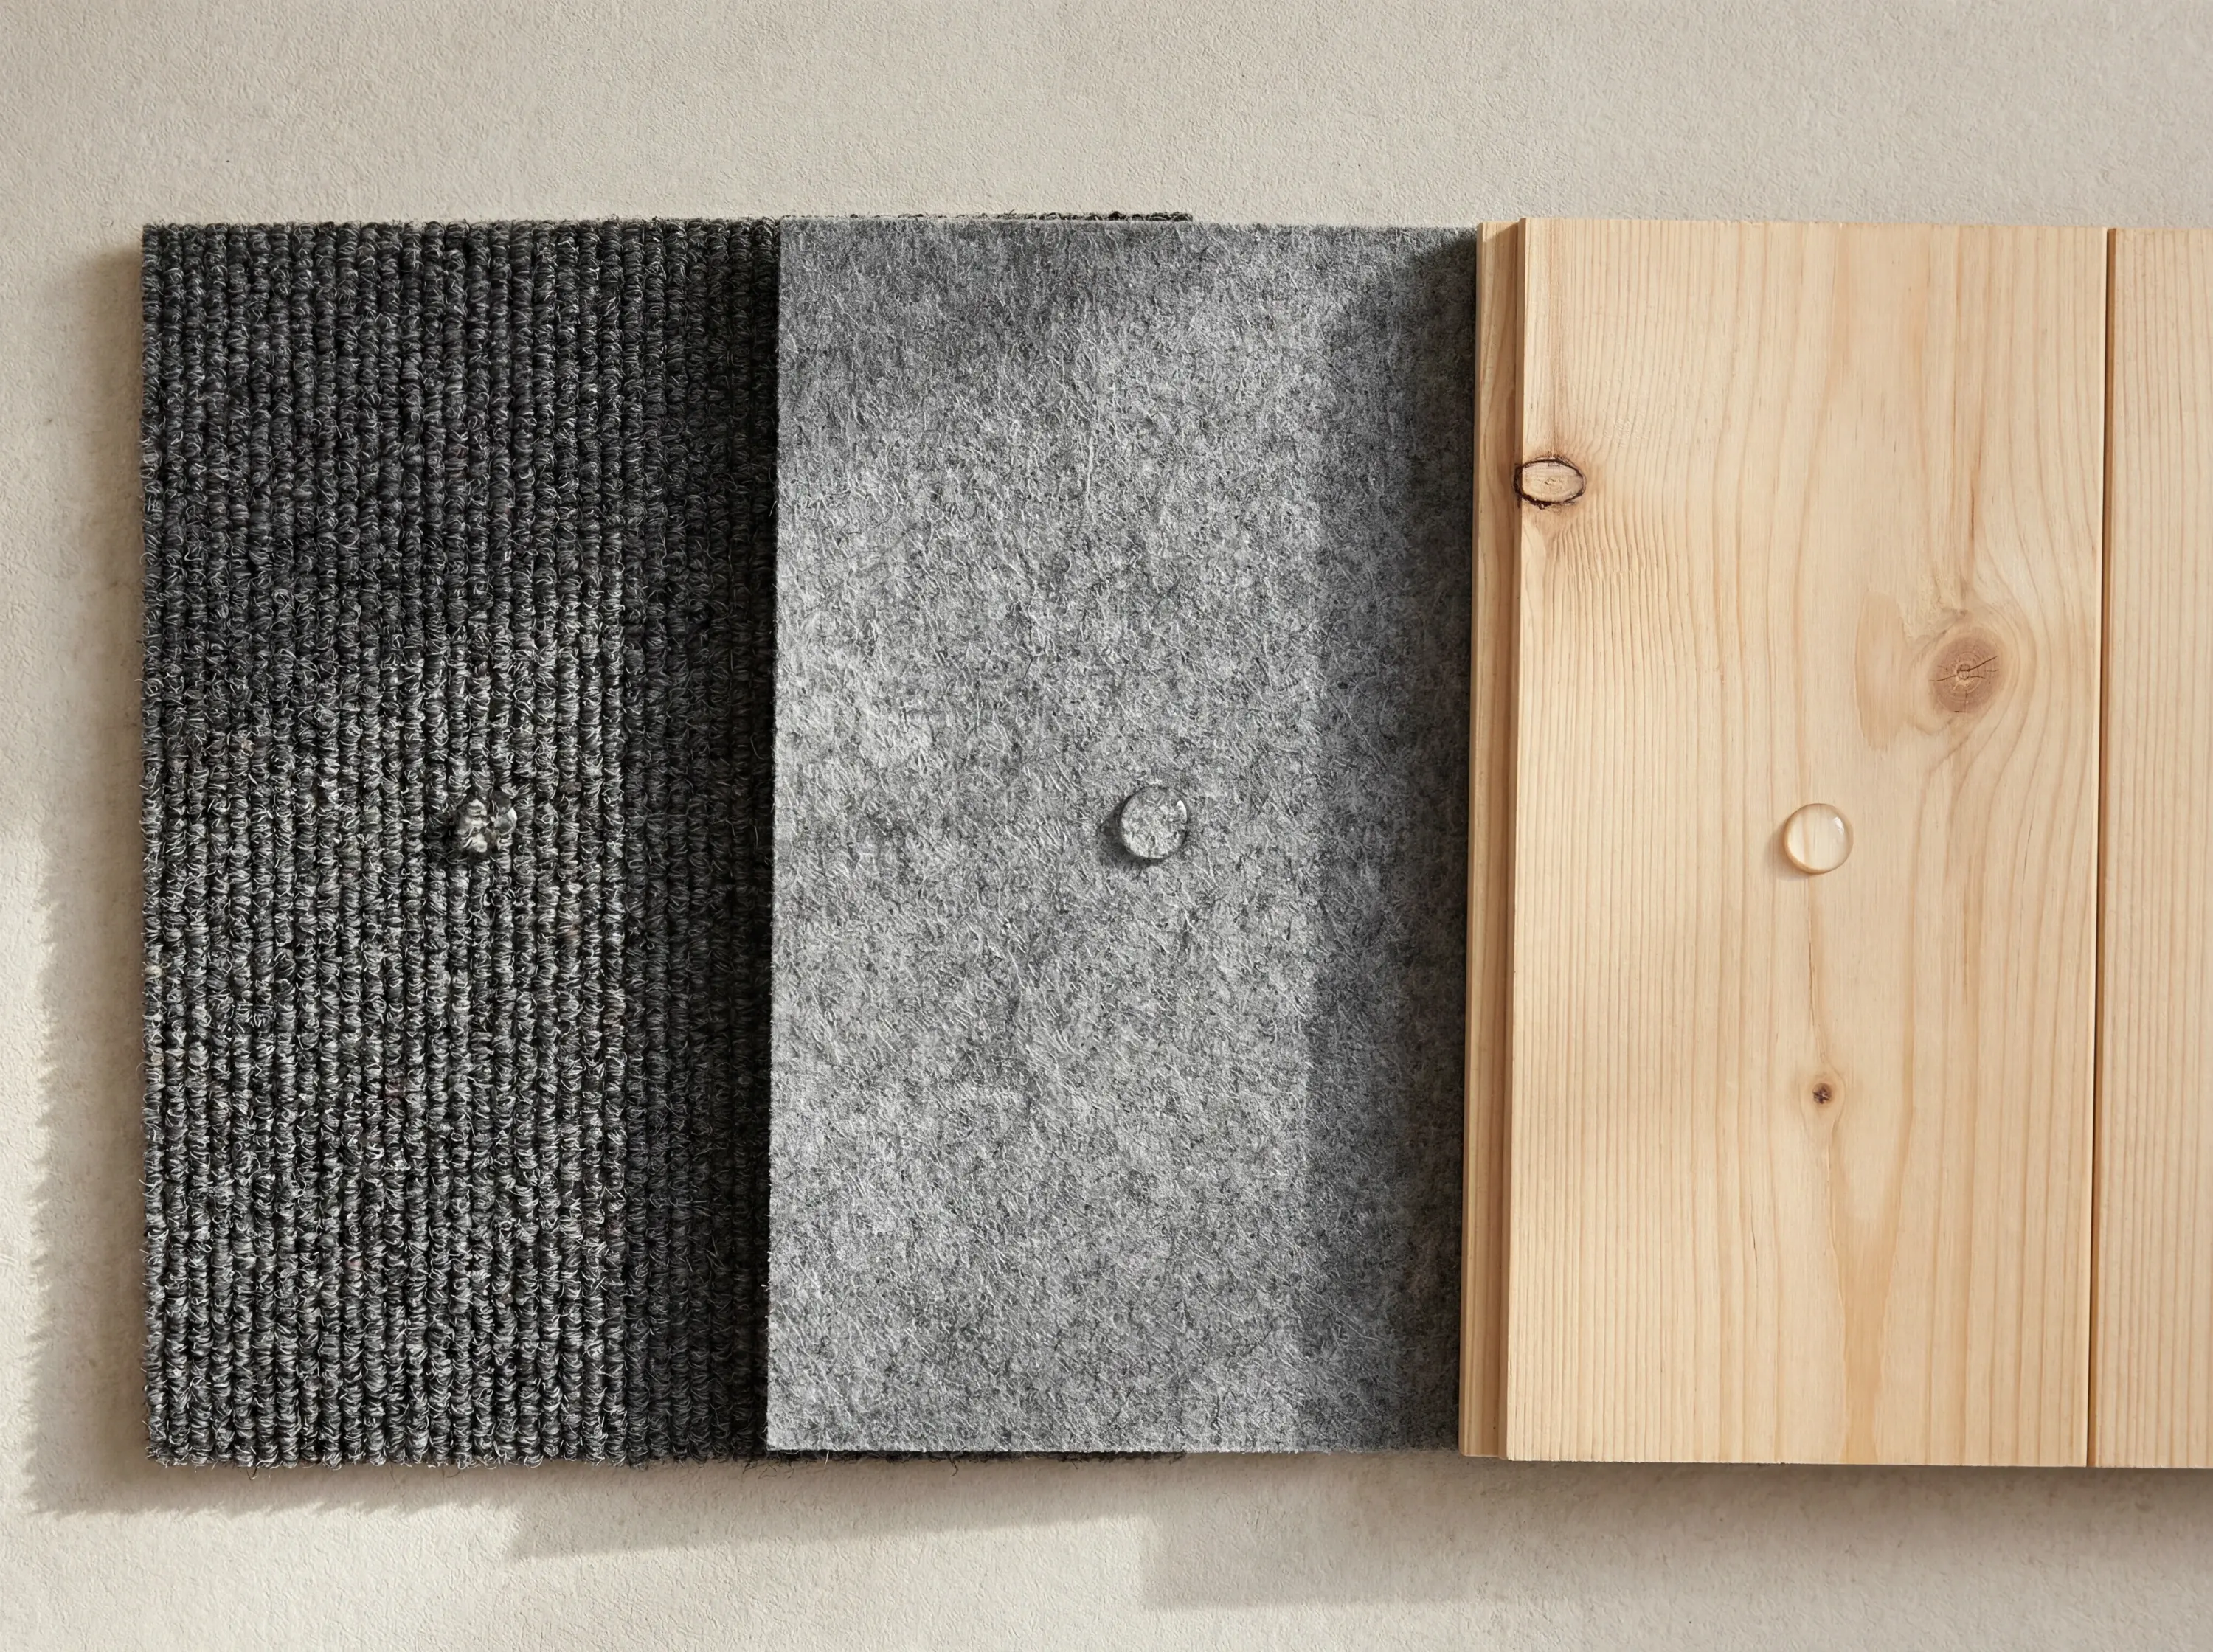
Carpet vs felt vs wood: the honest guide to campervan interior linings
Carpet, felt or wood? Your campervan's lining shapes how it looks, sounds and copes with damp, and the best choice isn't the one most people assume. An honest, practical comparison.