Campervan Kit & Gear
Campervan flyscreens: the £40 option vs the £500 one

Written by
Arthur
Arthur writes buying guides, comparisons, and in-depth explainers to help readers choose the right campervan or motorhome with confidence.
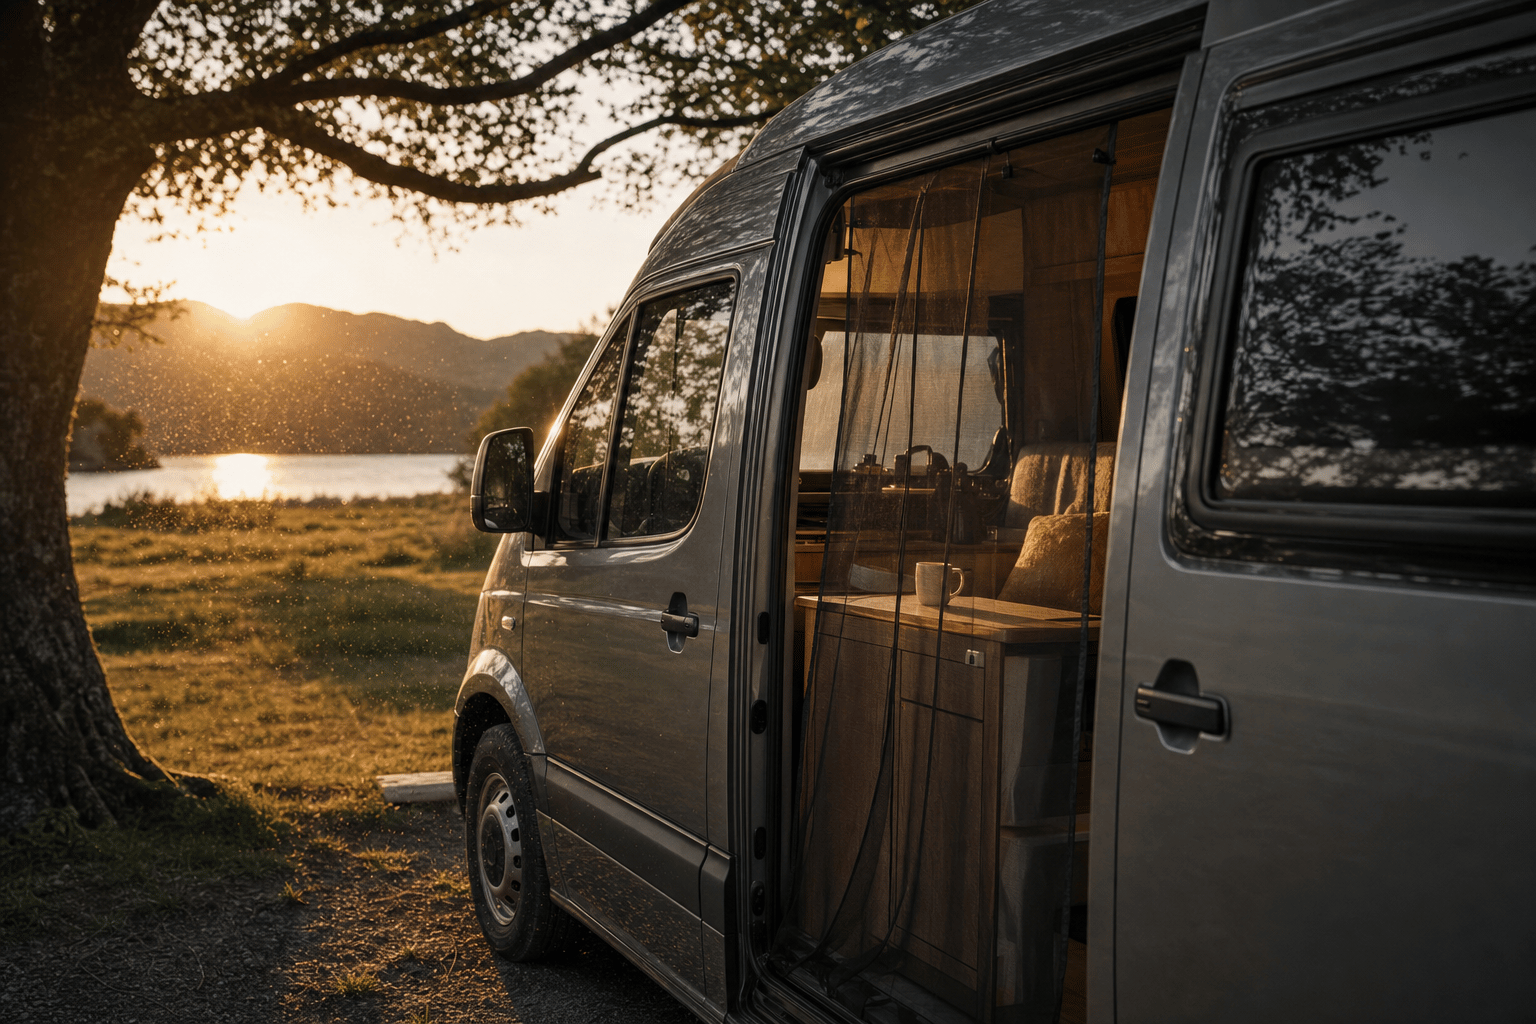
There's a moment, on the first properly warm night of a trip, when a flyscreen stops being an accessory and becomes the most important thing in the van. You want the doors open for the air; the midges, mosquitoes and moths want in. A flyscreen is the fine mesh that lets you have the first without the second, and anyone who has spent a sleepless night swatting in a hot, sealed van, or a Scottish evening being eaten alive with the door shut, knows exactly how much it matters.
For such a simple idea, though, there's a surprising amount to it. Flyscreens come in different types for different parts of the van, in two main mechanisms that behave very differently, and at prices that range from about £40 to over £500 for what is, fundamentally, a bit of mesh. So this is the full guide: what the types are, how magnetic and sliding screens really compare, the difference between the manufacturer-fit systems and the cheaper aftermarket ones, what it all costs, and, crucially, which are genuinely worth the money for the way you actually use your van. We'll also clear up a couple of products that get called flyscreens but aren't, so you don't buy the wrong thing.
Why flyscreens matter more than you'd think
It's easy to dismiss a flyscreen as a nice-to-have until your first bad night, so it's worth being clear about why they earn their place. The obvious reason is sleep: on a warm night a van with the doors and windows shut becomes a sauna, but open them without a screen and you're sharing the space with everything that flies. The less obvious reason is the British midge. In much of Scotland, the Lake District and parts of Wales, the Highland midge in particular is so small and so numerous in summer that an evening outdoors can be miserable and a night with an open, unscreened window unthinkable. A flyscreen is what lets you have airflow in midge country at all.
There's a second, quieter benefit: ventilation, and with it condensation control. Campervans are damp environments, two people breathing and cooking in a small sealed box overnight produces a startling amount of moisture, which condenses on cold surfaces and, over time, causes mould and that musty van smell. Being able to leave a window or a roof vent cracked open all night, securely and without insects, is one of the best ways to manage that moisture. So a flyscreen isn't only about comfort on a hot night; it's part of keeping the van healthy and dry, which is why even owners who rarely camp in heatwaves end up valuing them. Think of them less as a summer luxury and more as the thing that lets you ventilate a van properly, whatever the season.
What a flyscreen is, and the types you'll meet
A flyscreen, also called an insect screen, bug screen or mosquito net, is a fine mesh fitted over an opening you want to leave open in warm weather, letting air through while keeping insects out. Simple enough. Where it gets more involved is that a campervan has several openings worth screening, and several ways of holding the mesh in place.
By location, there are four main types. The big one is the sliding-door screen, covering the main side entrance, the opening you'll use most and the one a screen makes the biggest difference to. Then there are rear or tailgate screens, for vans with rear barn doors or a lifting tailgate, useful if you sleep with the back open or run an east-west bed. Cab-door screens fit over the wound-down driver and passenger windows, so you can leave them cracked overnight for airflow. And habitation window screens are the built-in mesh that comes with the proper motorhome-style windows in many conversions, usually combined with a blind in one cassette.
By mechanism, there are really two that matter, plus a couple of others. The first is the magnetic mesh curtain: a sheet of mesh with magnets sewn along the edges (and often a magnetic or zip closure up the middle) that snaps to the steel of the van body or a fitted strip. The second is the sliding or pleated cassette screen: pleated mesh, like a concertina, that runs in guide rails and pulls across the opening, latching shut with a magnetic catch and folding flush into a slim cassette when open. There are also roller screens (spring-loaded mesh in a cassette, common in habitation-window units) and fixed or hook-and-loop mesh (a tailored panel stuck around an opening with Velcro). But the choice most buyers actually wrestle with is magnetic versus pleated, so that's where we'll spend the most time.
Magnetic versus sliding: the choice that matters
This is the heart of it, because for the all-important sliding-door screen, you're usually choosing between a cheap magnetic curtain and an expensive pleated cassette, and they behave completely differently. Here's the honest comparison.
| Factor | Magnetic mesh curtain | Sliding / pleated cassette |
|---|---|---|
| Price | Cheap, around £40 to £70 | Expensive, around £300 to £525 |
| Insect sealing | Good central seal, but edges can lift | Closes flush, very good seal |
| Ease of use | Walk through, magnets re-close behind you | One-handed slide, stays put when fitted |
| Durability | Simple; cheap ones can tear, magnets last | Pull-cords and frames can fail (see below) |
| Retrofit | Trivial, tool-free, fits almost any van | Harder; needs a frame fitted to the aperture |
| Looks | Aftermarket, a curtain in the doorway | Neat, "factory-fitted" appearance |
The magnetic mesh curtain is the budget hero. It's a sheet of mesh, magnetised round the edges, that you fix across the door opening; you walk through the middle and the magnets snap shut behind you. It costs little, fits almost any van with no tools and no modification, packs away to nothing, and does the basic job well. The honest weaknesses are that it looks like what it is, a curtain hanging in the doorway, that cheaper ones can tear or have gaps between the sewn-in magnet pockets where a determined midge gets through, and that the bottom edge can lift in a breeze unless it's weighted or fixed down. For a retrofit on an already-converted van, or for anyone who wants insect protection without spending much, it's the sensible default, and plenty of experienced owners use nothing else.
The sliding pleated cassette is the premium, built-in answer. The pleated mesh pulls across like a concertina and latches shut, sealing flush against the door frame, then folds away into a slim cassette when you don't want it. It looks neat, almost factory-fitted, seals very well, and is a pleasure to use, a one-handed slide rather than a curtain to wrestle. The catches are the price, five to ten times the magnetic option, the fact that it's much easier to fit during a conversion than to retrofit into a finished van (it needs an aluminium frame fitted to the aperture, and enough clearance from your furniture), and a genuine durability question we'll come to: the pull-cords and plastic frames on some of these screens have a track record of failing. So it's the elegant, well-sealed, expensive option, best specced when the van is being built.
The mesh matters: midges versus mosquitoes
Here's a detail that catches people out, and it's worth more than the brand on the box: not all mesh stops everything. A standard insect mesh, the sort on a typical flyscreen, will keep out flies, wasps, moths and mosquitoes perfectly well. But the Highland midge is tiny, far smaller than a mosquito, and a standard mesh with a coarser weave can let them straight through. If you camp in midge country in season, the fineness of the mesh matters as much as how well the screen seals, and you want a genuinely fine "no-see-um" or midge-grade mesh rather than a basic net.
This is one reason the cheapest, most generic magnetic curtains can disappoint in Scotland specifically: they stop the obvious insects but not the midges that are the actual problem. When you're buying, it's worth checking the mesh grade, not just the fit and the price, if midges are on your itinerary. The flip side is that very fine mesh restricts airflow a little more than a coarse one, so there's a small trade-off between keeping the tiniest insects out and maximising the breeze, but in midge season most people gladly take the finer mesh. The lesson is to match the mesh to your enemy: a basic net is fine for English campsites and mosquitoes abroad, but for a Scottish summer, insist on a fine midge mesh whatever type of screen you choose.
Insect protection abroad
A quick word for anyone taking the van to the continent, because the insect picture changes. In much of southern Europe, mosquitoes are the main concern rather than midges, and the good news is that a standard insect mesh stops mosquitoes perfectly well, so you don't necessarily need the ultra-fine midge mesh that Scotland demands. What does change is how much you rely on the screens: in a hot Mediterranean summer you'll want the doors, windows and roof vents open most evenings, so good, well-sealing screens on every opening earn their keep far more than they might on a cool British trip.
The practical upshot is that for European touring, completeness matters more than mesh fineness: make sure you can screen the side door, the windows, the cab and the roof, so you can ventilate fully without letting mosquitoes in, but a standard mesh grade is fine. For the UK, especially Scotland, the priority flips to mesh fineness over completeness. It's worth knowing which trip you're equipping for, because the ideal setup differs slightly: fine mesh everywhere for the Highlands, well-sealed standard mesh on every opening for the Med. Most owners end up wanting both, fine mesh fitted everywhere, which covers all bases.
Manufacturer-fit versus aftermarket and custom
The other big distinction is who makes the screen and how it's designed to fit, and it maps roughly onto the magnetic-versus-pleated divide.
The manufacturer-fit, OEM-style systems are the pleated and cassette screens. Remis is the big name here: its REMIcare Van is a pleated sliding-door flyscreen with an aluminium frame that closes flush to the door pillar, with options like a table rail (so you can fix your table from outside with the screen shut) and a rain deflector, and it's made for the Fiat Ducato and its Peugeot Boxer and Citroën Relay cousins, with a newer version targeting the Ford and VW vans too. Dometic's Flytec FT200 is the other main pleated sliding-door screen, again for the Ducato family, with a magnetic lock. For habitation windows, Dometic's Seitz blinds and Remis's Remiflair systems combine a blackout blind and a pleated flyscreen in one cassette, which is what you'll find fitted to proper motorhome-style windows. These are the screens that look built-in because, on a factory or professional conversion, they are.
The aftermarket and custom end is broader and generally cheaper. Brandrup's FLYOUT range makes tailored hook-and-loop nets for VW campervans, the California and Transporter, for the sliding door, the tailgate and the windows, neat fitted nets that attach with Velcro around the opening. Reimo offers similar fine-mesh nets for VW vans. UK-made NOZONE produces tailored insect screens for the Ducato, Transit, Sprinter, Crafter and others, using zips, buckles and magnets. And then there are the universal magnetic kits, sized large or small to fit the common vans, from brands like Van-X and various specialists, which are the cheap, fit-anything option. The pattern is: OEM pleated systems for a neat, sealed, build-it-in result at a price; tailored aftermarket nets for a good fit on a specific van; and universal magnetic kits for cheap, easy, retrofit protection.
What flyscreens cost
Here's the price picture, and it deserves a clear health warning: these are leisure-trade products whose prices move a lot, vary between retailers, and (for the German brands) shift with the exchange rate. As a striking example, the same Dometic Flytec sliding-door screen has been listed by different UK retailers on the same day anywhere from around £300 to £455. So treat the figures below as the shape of the market, and always price-check two or three sellers before buying.
| Type | Typical UK price |
|---|---|
| Universal magnetic curtain (door) | ~£40 to £70 |
| Cab-window magnetic net | ~£42 |
| Tailored VW net (sliding door / tailgate) | ~£140 to £150 |
| Genuine VW clip-in window screen | ~£120 to £145 |
| Pleated sliding-door cassette (Dometic Flytec) | ~£300 to £455 |
| Pleated sliding-door cassette (Remis REMIcare Van) | ~£520 |
| Window blind + flyscreen cassette (Dometic Seitz) | ~£180 to £306 |
| Window blind + flyscreen cassette (Remis Remiflair) | ~£52 to £236 |
The headline takeaway is the gulf between the magnetic and the pleated options: you can screen your side door for under £70, or for over £500, and the question the rest of this guide really answers is whether that extra money is worth it for you. For many owners, honestly, it isn't; for some, it is. It depends on how you use the van, which we'll get to.
The best flyscreens for popular vans
What's "best" depends heavily on what you drive, because the screens are designed around specific vans. Here's the practical steer for the three most common UK bases.
For the VW Transporter and California (T5, T6, T6.1), the well-regarded tailored option is the Brandrup FLYOUT range, neat fitted nets for the sliding door, tailgate and windows that the California community rates highly, though the hook-and-loop fitting is a bit fiddly. For the small sliding window, the genuine VW clip-in screen is tidy. And the budget route is a small-size universal magnetic curtain for the sliding door, which owners often rate the central magnet closure of over a zip. There's no mainstream pleated cassette commonly fitted to the T-series sliding door, partly a space issue, so VW owners tend to choose between tailored nets and magnetic curtains.
For the Ford Transit Custom, the compact, increasingly popular camper base, a three-zip magnetic sliding-door screen is the common owner choice, and UK-made NOZONE explicitly covers the Transit. Remis's newer urban-van flyscreen now lists the Ford Tourneo Custom too, so a pleated option is arriving for it, though it's new and not yet widely reviewed. The Custom is a slightly thinner market for screens than the others, so expect fewer off-the-shelf options and lean towards a good tailored or magnetic net.
For Fiat Ducato-based conversions (and the Peugeot Boxer and Citroën Relay), you get the most choice, because this is the workhorse of the conversion world. If you want the neat pleated cassette, the Dometic Flytec FT200 or the Remis REMIcare Van are both purpose-made for the Ducato sliding door, best fitted at conversion stage. For the rear barn doors, a two-thirds-width magnetic screen with a Velcro bottom edge, or a tailored magnetic rear-door net, does the job for around £50. And for the habitation windows, Dometic Seitz or Remis Remiflair blind-and-flyscreen cassettes are the answer if your conversion uses those window systems. The Ducato owner can spend a little or a lot; the choice is genuinely theirs.
Don't forget the roof: pop-tops, rooflights and vents
Doors and windows get all the attention, but the openings above your head matter just as much, and they're easy to overlook. Most proper rooflights and roof vents fitted to campervans and motorhomes come with a built-in flyscreen as part of the unit, a pull-across or roller mesh in the same cassette as the blind, so you can vent through the roof at night with the bugs kept out. If you're speccing a conversion, it's worth ensuring your rooflights have that integrated screen, because a roof vent is one of the best ways to ventilate without opening a door at all.
Pop-top elevating roofs are the trickier case. When the roof is up, the canvas sides usually have large zip-open windows for air and view, and these need their own bug nets; most pop-top windows have a fine mesh layer you can zip across in place of, or behind, the canvas panel. If you're buying a pop-top camper, check that its roof windows have insect mesh, because sleeping up top on a warm night with the canvas windows open is glorious, and impossible without a screen. The principle is the same as down below: anywhere you'd open for air, you want a screen, and the roof is where people most often forget, then regret it on the first warm night under the canvas.
Screening the cab
It's easy to focus on the habitation area and forget the cab, but the driver and passenger windows are some of the most useful openings to screen, especially on a hot night. Winding the cab windows down a few inches creates lovely cross-ventilation with a habitation window or roof vent open, but it also lets insects straight into the cab, from where they find their way into the living space. A pair of cab-window flyscreens, fine mesh panels that fit over the wound-down windows, solves this, and they're cheap, often around £40 for a magnetic or fitted pair.
There are two common types. Magnetic or fitted mesh panels go over the outside or inside of the window aperture and let you leave the glass down behind them. Some owners use simple slip-over mesh socks; others fit tailored magnetic nets shaped to the door. Either way, they turn the cab into a usable part of your ventilation strategy rather than a sealed box you daren't open. If you tend to sleep with the cab as part of the airflow, or just want a through-breeze on a sweltering night, cab screens are an inexpensive, often-overlooked addition that makes a real difference, and they pair naturally with whatever you've fitted to the side door and the roof.
Habitation window screens
If your conversion uses proper motorhome-style habitation windows, the acrylic double-glazed units common on coachbuilt motorhomes and many panel-van conversions, the flyscreen is usually built in, and it's worth understanding how those work. These windows typically come with a combined blind-and-flyscreen cassette: a pleated or roller blackout blind pulls down from the top, and a pleated flyscreen pulls up from the bottom, meeting in the middle wherever you want them. The Dometic Seitz and Remis Remiflair systems are the two big names, and they're what you'll find on most factory and professional conversions using those windows.
The beauty of these is that the insect protection is integrated, you don't fit a separate screen, it's part of the window. You simply pull the flyscreen across when you open the window for air. The thing to know is that they're a fixture of the window system, so you choose them when you choose your windows (or they come with the van), rather than buying them separately later. If you're having a van converted with these windows, the screens come as part of the package; if your van has simpler fixed or sliding glass windows instead, you're back to magnetic or tailored nets for those openings. Either way, for the habitation windows specifically, the built-in blind-and-flyscreen cassette is the neat, no-extra-effort answer, and it's one of the quiet advantages of a conversion that uses proper motorhome windows.
Common problems, and what owners actually say
A guide that only listed products would be doing you a disservice, because the real-world experience of these screens has some consistent themes worth knowing before you spend.
The biggest is a durability warning about the expensive pleated screens, which is counterintuitive given the price. Owners of the Remis sliding-door screen report the pull-cords snapping, with no official repair kit available and re-cording in situ difficult or impossible, and the plastic frame on the Dometic sliding-door screen is reported by some as brittle and prone to breaking. So the premium option, the one you'd assume is the most robust, has a genuine track record of fragility, particularly around the cords and frame. The most common way any fixed screen gets damaged is catching it, or its cord, when you close the door, especially if you have a bin or other kit mounted on the door. So if you go pleated, treat it gently and mind the door.
The second theme is a healthy scepticism among experienced owners about whether the expensive screens are worth it at all. More than a few seasoned campers argue that for a side door you don't actually use that heavily, a £50 to £60 magnetic kit "does the job", won't ever be quite as neat or well-sealed as the built-in ones, but saves you several hundred pounds and has nothing to snap. One owner's view that their magnetic screen "hasn't bothered them in five years" captures a common sentiment. The counterview, from those who fit pleated screens during a conversion, is that the neat, sealed, factory look is worth it and a pleasure to use daily. Both are valid; it comes down to how much you value the finish and how heavily you'll use the door.
What flyscreens don't do
One honest clarification, because it trips people up: a flyscreen is not a security device and not a privacy screen. The mesh keeps insects out, but it's a thin net, not a lock, so an open door with only a flyscreen across it offers no security at all, never treat it as a barrier when you're away from the van or asleep somewhere insecure. And because you can see through mesh, a flyscreen does little for privacy, especially at night with the interior lit, when people outside can see in more easily than you can see out. Those jobs belong to other kit: proper door and window locks for security, and blinds or thermal screens for privacy and blackout, which we cover in our thermal and magnetic blinds guide. A flyscreen does one job, insects, and does it well; just don't ask it to do the other two. The ideal warm-night setup is often a flyscreen for the bugs plus a blind for privacy, used together.
Fitting and living with them
A few practical notes for getting the best from whichever screen you choose. For magnetic curtains, the fit is the thing: make sure the magnets land on steel (some plastic-trimmed door surrounds aren't magnetic, so you may need to add a thin steel strip for them to grip), and weight or fix the bottom edge so it can't lift and let insects under, this is the most common gripe with cheap kits and it's easily solved. For tailored hook-and-loop nets, fitting the Velcro patches neatly and in the right place takes patience but only has to be done once; rushing it is the usual cause of a baggy, gappy net.
For pleated cassette screens, the golden rule is to mind the door and the cord. The single most common way these get wrecked is catching the mesh or its pull-cord when you slide the door shut, especially if you have a bin or other kit hung on the door, so make closing the screen and then the door a deliberate habit. And for all screens, the maintenance is simple but worth doing: brush or rinse the mesh occasionally (it clogs with dust and dead insects, which cuts airflow), let it dry before long storage, and check magnets and Velcro for grit. None of these screens is high-maintenance, but a little care, especially not slamming a door on a pleated screen, is the difference between one that lasts years and one that fails in a season.
How to choose
Pull it together, and the decision comes down to a few honest questions about how you actually camp.
If your van is already converted and you want insect protection without fuss or much expense, buy a good universal magnetic curtain for the door (and the rear, if you need it) and a cheap cab-window net. It's the sensible, low-cost, no-regrets choice for the majority of owners, and it fits this evening with no tools. If you're having a van converted, or you specifically want the neat, well-sealed, built-in look and you'll use the door constantly, that's the moment to spec a pleated cassette screen like the Remis or Dometic, while the conversion is open and fitting is easy, accepting the cost and treating the cords and frame with care. And whatever you choose for the door, if your van has proper habitation windows, the Seitz or Remiflair blind-and-flyscreen cassettes are the natural fit for those, often already present.
The one piece of advice that applies to everyone: don't overspend on a problem you don't have. A flyscreen's whole job is to let you sleep with the air in and the midges out, and a £50 magnetic curtain does that nearly as well as a £500 cassette for most people, most of the time. Spend the difference on a pleated screen only if the finish genuinely matters to you or you're fitting it during a build. Match the screen to your van and your habits, and the cheapest option that solves your actual problem is the right one.
To save you the decision, here are the sensible default picks. For most owners on a budget: a fine-mesh magnetic curtain for the side door (around £50 to £70) plus cab-window nets, the cheapest setup that solves the real problem. For a van being converted, or anyone wanting the neat built-in look: a pleated cassette screen (Remis or Dometic) for the side door, fitted during the build, plus the integrated blind-and-flyscreen cassettes on the habitation windows. For VW owners specifically: Brandrup's tailored FLYOUT nets are the community favourite, with magnetic curtains the budget alternative. And for everyone heading to Scotland: whatever type you choose, insist on a genuinely fine midge mesh. Get those few things right and you've solved insects in your van without overspending.
Making your own
For the genuinely budget-minded or the handy, it's worth knowing that a magnetic flyscreen is one of the easier things to make yourself, and plenty of owners do. The recipe is simple: a length of fine insect mesh cut to your door opening, and a set of strong neodymium magnets sewn or glued into a hem around the edges, positioned to land on the steel of the door frame. The total cost can be a fraction of even a cheap shop-bought kit, and you can tailor the mesh grade (a fine midge mesh, say) and the exact size to your van.
The honest caveats are that it takes some time and a bit of sewing, that you must use proper neodymium block magnets rather than the weak flexible magnetic strip (which won't hold the mesh against a breeze), and that the result will look homemade rather than tidy. But it works, it's cheap, and it lets you solve the door, the tailgate and the windows for very little. If you enjoy a small project and don't mind the look, a home-made magnetic screen is a perfectly good answer, and it's how a lot of self-builders handle insect protection without buying anything off the shelf at all. Our piece on thermal and magnetic blinds covers the same magnet trick for thermal screens, since the principle is identical.
Frequently asked questions
How much do campervan flyscreens cost?
It ranges enormously. A universal magnetic mesh curtain for the sliding door costs around £40 to £70, a tailored fitted net for a specific van around £140 to £150, and a premium pleated sliding-door cassette (like a Remis or Dometic) anywhere from about £300 to over £500. Habitation-window blind-and-flyscreen cassettes run from roughly £50 to £300 by size. Prices vary a lot between retailers and change often, so check two or three sellers.
Are magnetic flyscreens any good?
Yes, for most owners they're perfectly good and excellent value. A magnetic mesh curtain fits almost any van with no tools, costs little, and seals the door well enough that you can sleep with it open. The trade-offs versus an expensive pleated screen are that it looks more aftermarket, the edges can lift in a breeze, and cheaper ones can tear. Many experienced campers use nothing else and are happy. The pleated screens are neater and seal better, but cost five to ten times as much.
Magnetic or sliding flyscreen: which is better?
It depends on your priorities. Magnetic curtains are cheap (around £40 to £70), tool-free to fit, and easy to live with, but look aftermarket. Sliding pleated cassettes (around £300 to £525) seal flush, look factory-fitted and are lovely to use, but are far dearer, are best fitted during a conversion, and have a real track record of pull-cords and frames failing. For a retrofit or a budget, go magnetic; for a neat built-in finish on a van being converted, go pleated and treat it gently.
Can you fit a flyscreen to an already-converted van?
Magnetic curtains and tailored hook-and-loop nets, yes, easily, that's their strength: no tools, no modification. Pleated cassette screens are much harder to retrofit, because they need an aluminium frame fitted to the door aperture and enough clearance from your furniture, which is why they're really meant to be specced while the van is being converted. So if your van is already built, a magnetic or tailored net is usually the practical choice.
Are Khyam or Vanshades products flyscreens?
No, and it's worth knowing so you don't buy the wrong thing. Khyam makes drive-away tailgate awnings and tents, not insect screens. Vanshades makes blackout and privacy window "pods", which are blinds, not insect mesh. Both are good products, but neither is a flyscreen. For insect protection you want a magnetic mesh curtain, a tailored net (Brandrup, Reimo, NOZONE) or a pleated cassette (Remis, Dometic), depending on your van and budget.
What mesh keeps out Scottish midges?
A standard insect mesh stops flies and mosquitoes but can let the much smaller Highland midge through, so for Scotland in summer you want a genuinely fine "no-see-um" or midge-grade mesh. When buying any flyscreen, check the mesh fineness, not just the fit and price, if midges are on your itinerary. Very fine mesh restricts airflow slightly more, but in midge season it's a trade most people gladly make.
Do I need flyscreens on the roof vents too?
It's well worth it. Roof vents and rooflights are one of the best ways to ventilate a van overnight, which helps with both heat and condensation, but only if they have an insect screen so you can leave them open without bugs getting in. Most proper rooflights come with a built-in flyscreen; pop-top roof windows usually have a zip-in mesh panel. If you're speccing a conversion or buying a pop-top, check the roof openings have screens, because it's the spot people most often forget.
Are flyscreens worth fitting if I only camp occasionally?
Almost always yes, because even occasional campers hit the odd warm or midge-heavy night, and a cheap magnetic curtain costs little and fits in minutes. You don't need to spend much: a £50 magnetic kit covers the main need without commitment. It's the expensive built-in pleated screens that only make sense for frequent users or during a conversion. So fit something, just scale the spend to how often you'll use it, an occasional camper rarely needs a £500 cassette.
Should I fit flyscreens during a conversion or after?
If you're having a van converted, fit the pleated cassette door screens and the habitation-window blind-and-flyscreen cassettes during the build, because they're far easier to fit while the van is open and they need framing and clearance that's awkward to add later. If your van is already finished, don't worry: magnetic curtains and tailored hook-and-loop nets are designed to retrofit with no tools, so you can add insect protection to a completed van easily and cheaply. In short, build-stage for the built-in screens, retrofit-friendly magnetic or tailored nets for an existing van.
Will a flyscreen stop wasps and mosquitoes as well as flies?
Yes. A standard insect mesh keeps out flies, wasps, moths and mosquitoes without trouble, that's the easy part. The only insect that defeats a standard mesh is the tiny Highland midge, which needs a finer "no-see-um" mesh. So for almost everywhere and almost everything, an ordinary flyscreen does the job; it's only Scottish (and similar) midges that demand the upgrade to a fine mesh.
Do flyscreens give you any privacy or security?
No, and it's important not to rely on them for either. A flyscreen is a thin insect mesh: it offers no security (it's not a lock or a barrier, so never treat an open, screened door as secure) and little privacy (you can see through mesh, especially at night with the lights on). For security you need proper locks; for privacy and blackout you need blinds or thermal screens. Use a flyscreen for insects and pair it with a blind for privacy.
The reachable bit
A good flyscreen is one of those small upgrades that quietly transforms van life, the difference between a stifling, sealed night and a cool one with the door open and not a midge in sight. It's also, happily, one of the cheap joys of owning a camper, unlike the camper itself. That gap, between the affordable kit and the unaffordable van, is the whole reason Campervan.win exists.
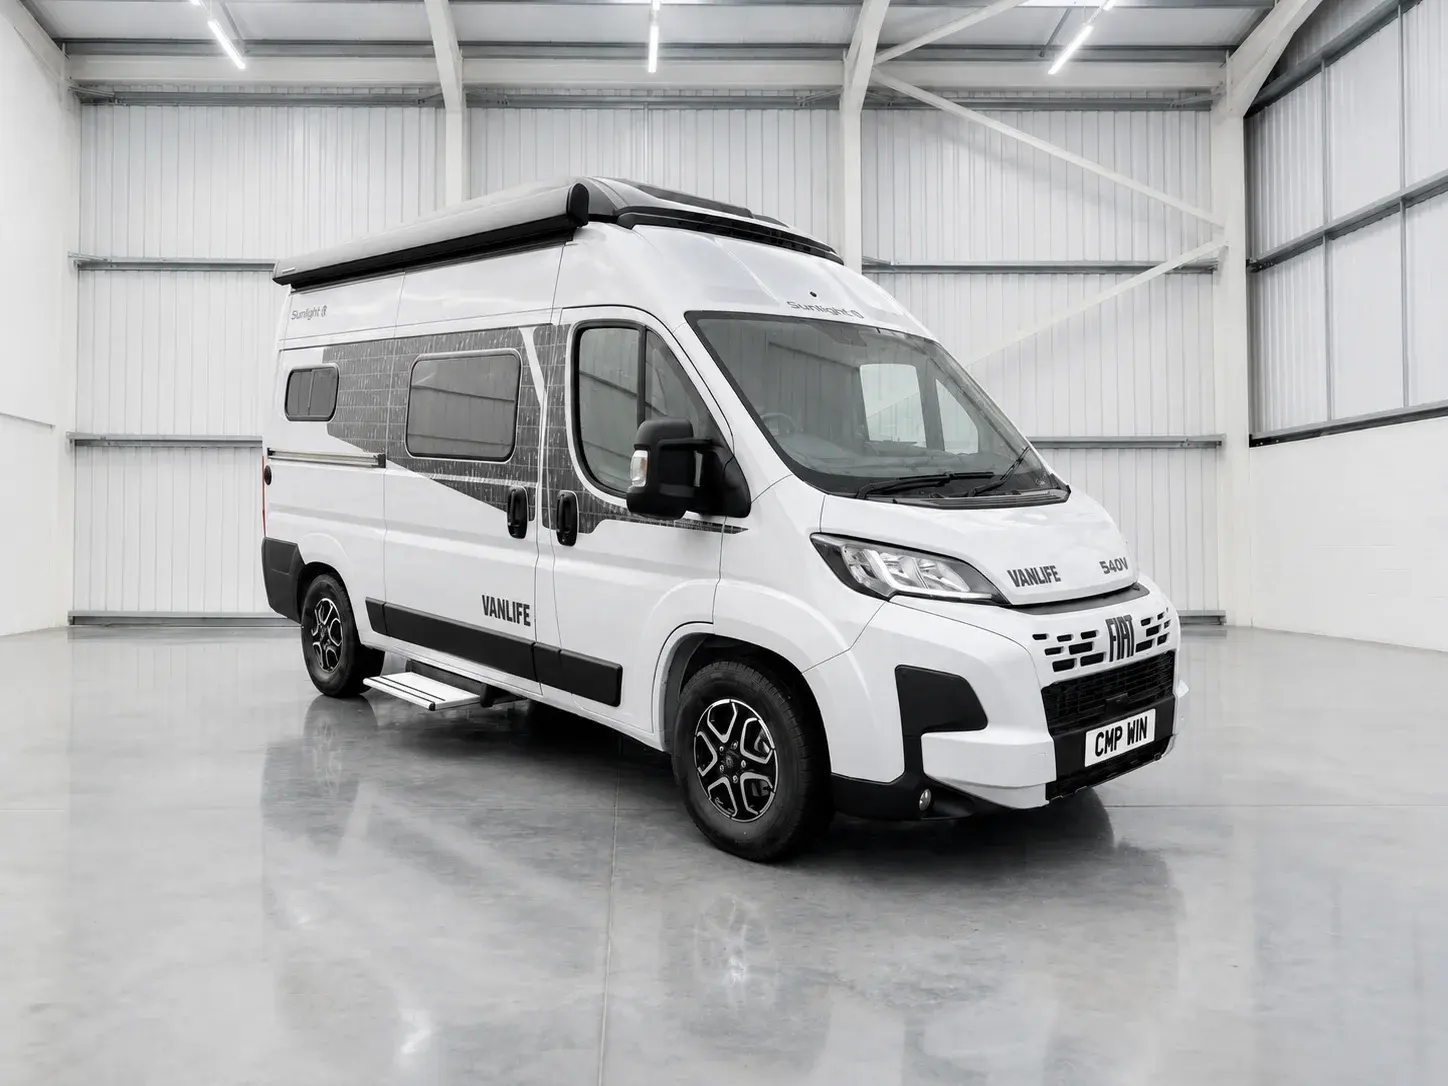
We give away a Sunlight Vanlife 540 V, a clever, well-built camper you can read about in our full review. A van like that costs north of £60,000, out of reach for most of the people who'd love one, and closing that gap is the point: capped entries so the odds stay honest, £10 a ticket, a maximum of five per person, £500 to a UK charity from every full draw, the winner picked by a public randomness beacon anyone can re-check, and one person driving away in the van itself. Add the flyscreens, the awning and the rest once it's yours. The keys are the hard part, and that's the bit we're trying to make reachable.
Enjoyed this post?
Get more honest campervan guides like this one in your inbox.
You’re in!
Check your inbox. We’ve just sent you a welcome email.

About the author
Arthur
Arthur writes buying guides, comparisons, and in-depth explainers to help readers choose the right campervan or motorhome with confidence.
Keep Reading
Related Reading
Thoughtful articles that build on what you’ve just read.
Campervan Kit & Gear
24 min read
Campervan leveling options: what's best, what's best value, and what should you choose?
A plain-English, in-depth look at every way to level a campervan or motorhome on a sloping pitch, from £20 ramps to fully automatic hydraulic systems, with honest UK prices and advice on which one actually suits you.
Campervan Kit & Gear
27 min read
Lock'n'Level review: a great little tool, and why a smart 'Pro' version makes sense
An honest, hands-on look at the Lock'n'Level levelling system, what it does brilliantly, where it falls short, and why an app-connected electronic version with auto-levelling would be a natural next step.

Campervan Kit & Gear
25 min read
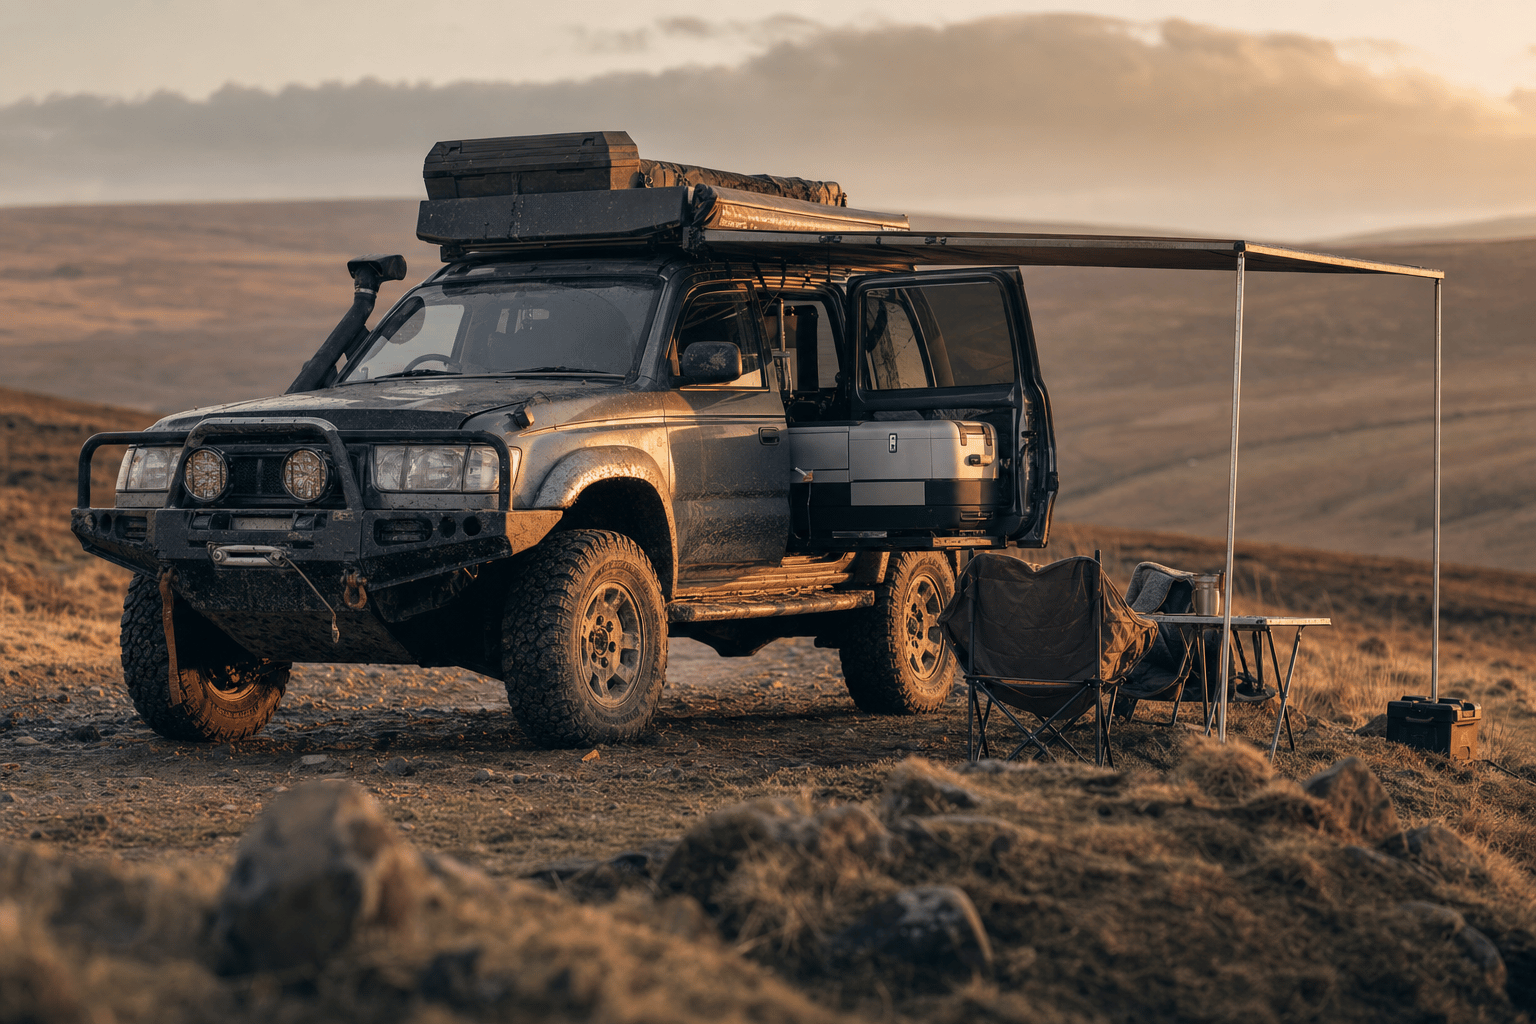
ARB awning vs Thule awning: one's for 4x4s, one's for campervans
ARB and Thule both make excellent awnings, but they're built for different vehicles and different lives. One is a rugged, rack-mounted pull-out for 4x4s and overlanders; the other is the wind-out cassette awning that defines campervan and motorhome touring. Here's how they really compare, and which one you actually want.
Campervan Kit & Gear
25 min read
Is ARB worth it? The 4x4 gear, honestly reviewed
ARB is the Australian 4x4 giant whose lockers, suspension, fridges and awnings turn up on the world's most serious overland vehicles. But is it worth the premium for a UK campervan or 4x4 camper owner? Here's an honest review of the standout ARB kit, what to skip, and what it really costs.