Campervan Kit & Gear
Campervan thermal blinds: the cure for cold nights and wet windows

Written by
Martha
Martha writes about interiors, ownership stories, and the everyday realities of campervan life, with a focus on comfort, cost, and how vans are used over time.
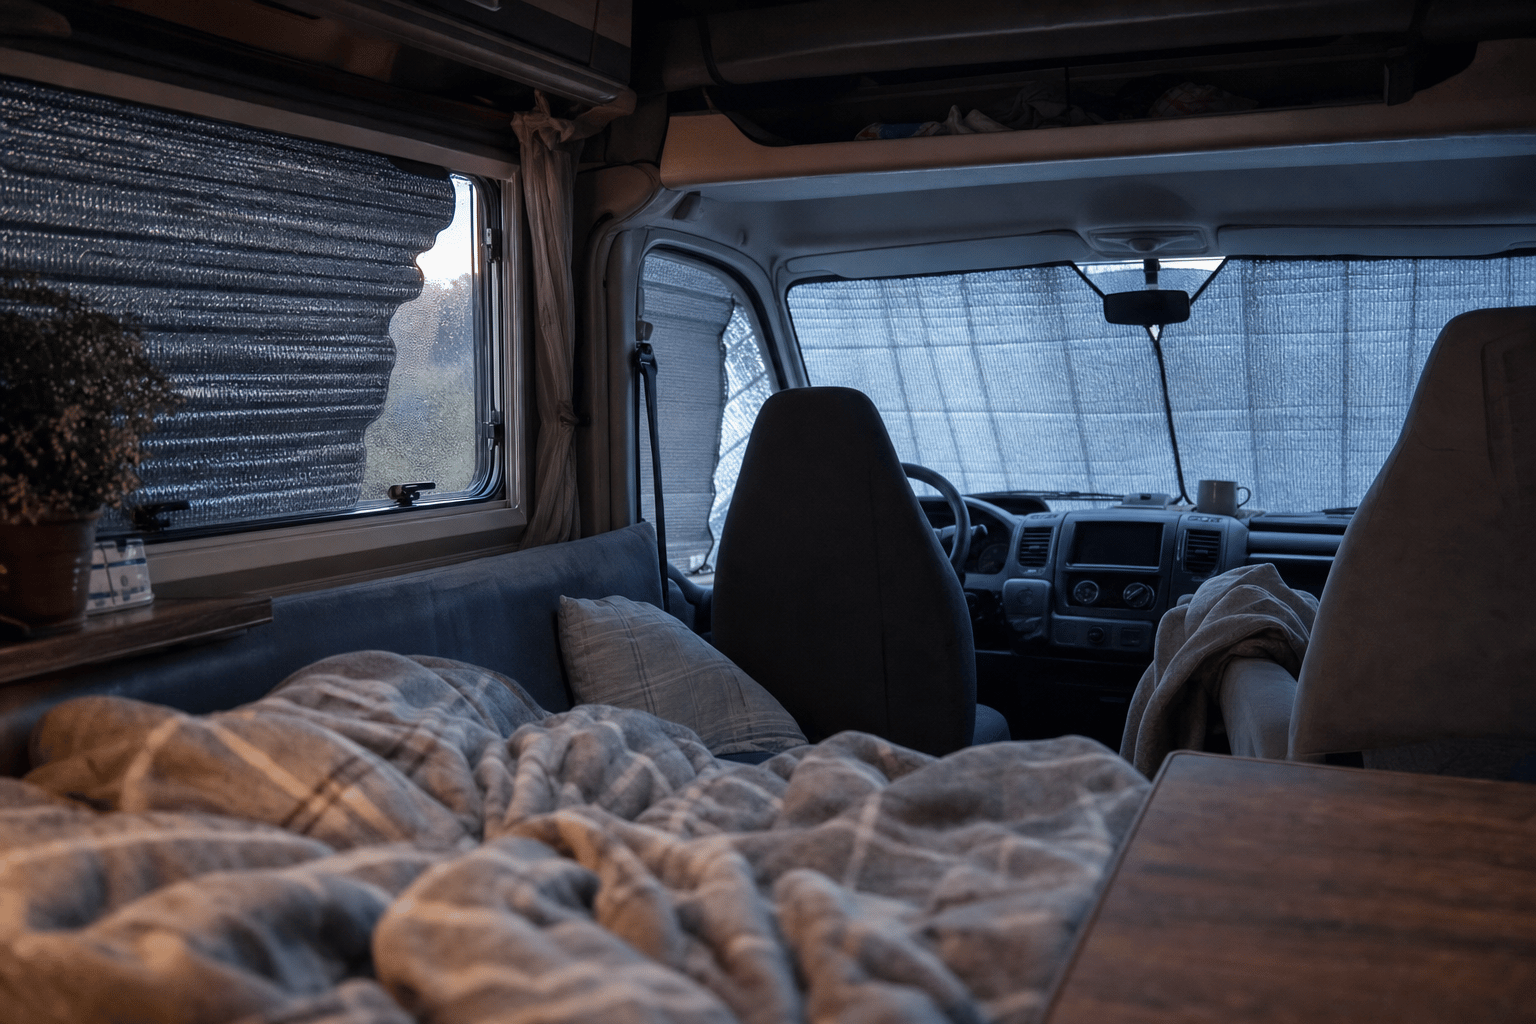
There are two nights that teach every campervan owner the value of thermal screens. The first is the frosty one, when you wake to find the inside of the windscreen running with condensation and the cab so cold it leaches the warmth out of the whole van. The second is the baking one, when the sun turns the cab into a greenhouse by eight in the morning and there's nowhere cool to be. Thermal screens, the insulated panels you fit over the glass, are the answer to both, and for anyone who uses their van outside the warmest weeks of summer, they're one of the highest-value upgrades there is.
They're also more involved than they first look, because there's a real choice to make: internal screens or external, magnetic or suction-fixed, and a separate, important question about the pop-top roof, which is the coldest part of any elevating-roof van. So this is the full guide. We'll explain the types, settle the internal-versus-external debate honestly, look at why magnetic blinds are worth the extra, tackle the pop-top properly, and go through brands, prices and what's actually worth buying. A couple of things people get told are wrong, too, so we'll set those straight as we go.
What thermal screens are, and the two families
A thermal screen is an insulated panel, usually several layers of reflective foil and foam or fleece, that covers a window to slow heat moving through the glass. In winter it keeps the warmth in and the cold out; in summer it reflects the sun's heat away; and year-round it helps with the campervan's great enemy, condensation, by stopping warm, moist interior air from hitting cold glass. The cab is the priority because a van's windscreen and cab side windows are a huge, uninsulated area of glass, by far the biggest thermal weak point in most campers, which is why the classic purchase is a three-piece cab set: windscreen plus both cab side windows.
There are two families, and the difference between them is the single most important thing to understand. Internal thermal screens fit inside the van, against the glass. External thermal screens fit outside, over the cab from the front. They sound almost the same, and they're not, they behave quite differently in condensation, warmth, security and convenience, and choosing between them is the real decision. We'll compare them properly in a moment. Beyond the cab, the same idea extends to the habitation windows (often with magnetic blackout-and-thermal blinds) and, crucially, to the pop-top roof, which needs its own solution because it's the coldest surface in the van. Let's take each in turn, starting with the choice that matters most.
Condensation: the real reason to bother
Warmth is the obvious reason for thermal screens, but condensation is the one that does the lasting damage, and it's worth understanding because it shapes which screens you should buy. Here's the physics, briefly. Two people sleeping and cooking in a small van overnight release a remarkable amount of moisture into the air, litres of it, as water vapour. Warm air holds more moisture than cold air, so when that warm, damp interior air touches a cold surface, the windscreen, the cab windows, the pop-top canvas, it cools, can't hold the moisture, and dumps it out as condensation: those streaming windows and damp roof linings you wake up to. Over time, that moisture causes mould, musty smells and damage to trim and soft furnishings. It's not just unpleasant; it's bad for the van.
This is exactly why the internal-versus-external distinction matters so much. An external screen keeps the glass warm, so the cabin air never meets a cold surface there and doesn't condense, that's why externals beat condensation. An internal screen leaves the glass cold behind it, so while it slows heat loss, the cold glass still pulls moisture out of any air that reaches it. The other half of the answer is ventilation: condensation is moisture meeting cold, so as well as keeping surfaces warmer with screens, you want to let some of that moist air escape, which is why experienced owners crack a roof vent or window overnight even in winter. Thermal screens and ventilation work together: the screens keep the warmth in and the cold surfaces fewer, the ventilation carries the moisture out. Rely on screens alone, especially internal ones, and you'll still wake up damp. Understanding that condensation, not just cold, is the enemy is what turns a thermal-screen purchase from a guess into a strategy.
Internal versus external: the choice that matters
This is the debate every owner has, so here's the honest comparison, because each genuinely wins on some things and loses on others.
| Factor | Internal screens | External screens |
|---|---|---|
| Condensation | Worse, glass stays cold and damp air condenses on it | Better, keeps the glass warmer so condensation forms outside |
| Warmth / heat | Reflects some heat, but the glass still gets cold or hot | Stops heat and cold at the glass; better in deep cold and strong sun |
| Security / privacy | Discreet, no sign from outside that the van is occupied | Advertises an occupied or empty van to passers-by |
| Packing | Stay dry inside, easy to stow | Get wet with rain or dew, need drying to avoid mould |
| Wind | Unaffected | Can flap or need removing in strong wind |
| Price | Cheaper | Dearer |
| Fitting | Fiddlier, multiple pieces, suckers can slip | Usually one piece, fitted from outside in minutes |
The case for external screens is performance. Because they sit on the outside, they keep the glass itself warm, which is the key to beating condensation: the warm side of the glass faces in, so moist cabin air doesn't condense on it, and any condensation forms harmlessly on the outside. They're also more effective in genuine extremes, deep cold and strong summer sun both, because they stop the heat transfer at the glass rather than after it. The UK owner consensus is that for condensation and outright thermal performance, external screens win.
The case for internal screens is everything else. They're cheaper. They're discreet, no external cover announcing that there's a van here worth breaking into, or that it's empty, which is a genuine security and stealth advantage, especially wild camping or overnighting in towns. They stay dry, so you can whip them down and stow them without a soggy, mouldy cover to deal with. And they're unaffected by wind, where an external screen can flap or need taking off in a gale. The trade-off is that the glass behind them still goes cold, so they don't beat condensation the way externals do, and in strong sun the cab can still heat up.
So the honest steer: if your priority is condensation and warmth, and you don't mind the cost, the wet packing or advertising your presence, go external. If you value security, stealth, dry stowage and a keener price, go internal, and accept a bit more condensation. Many owners who camp in genuinely cold conditions end up using both, internals and externals together, plus thermal curtains behind the cab, for the worst nights. Which is right for you depends on where and how you camp, and being honest about that matters more than any brand.
Security, stealth and the external trade-off
One factor that doesn't show up on a spec sheet but matters a lot in practice is what a screen says to the outside world, because it affects how and where you can comfortably use the van. An external cab screen, fitted over the windscreen from outside, is a visible sign that someone is camped in the van, or, when you're out, that the van is unattended. For anyone who wild camps, overnights in towns or laybys, or values stealth, that's a genuine drawback: it advertises your presence and can attract unwanted attention. An internal screen gives nothing away; from outside, the van just looks like a parked van with dark windows, which is exactly what a discreet overnighter wants.
This is why plenty of owners who'd benefit from external screens' superior condensation performance still choose internal ones, or keep internal sets for stealth nights and externals for campsite use. It's also why the "best" screen genuinely depends on how you travel: a campsite camper who's plugged in and visible anyway loses nothing by fitting externals and gains the condensation benefit, while a stealth overnighter may rate the discretion of internals above all else. If quietly blending in matters to you, factor it into the choice, it's a real consideration that the pure thermal comparison misses, and for some people it's the deciding one.
How they attach, and why magnetic is worth it
The other choice is how the screen fixes to the van, and this is where the word "magnetic" in the title earns its place, because the fixing method makes a real difference to how well a thermal blind works day to day.
There are three common methods for internal screens. Suction cups are the cheap default: little rubber suckers that stick to the glass. Magnets are the upgrade: strong neodymium magnets sewn into the edges that snap to the steel of the door and window frames. And on some brands (Brandrup notably) the fixing is hook-and-loop (Velcro) patches stuck to the trim. External screens, by contrast, tend to anchor by tucking behind the doors and under the wipers, held by closing the cab doors onto their edges.
Magnetic internal blinds cost more, often roughly double, the same Kiravans cab set is around £45 with suckers or around £110 with magnets, but there's a real reason people pay it. Magnets hold firmly and don't drop off in the cold overnight the way suckers can, and, fitted well, they pull the edges of the blind tight to the bodywork, closing the gaps where light and cold leak in. That gap-sealing is the most common complaint about cheap suction blinds: a sucker that sits a little way from the edge leaves a gap that lets in light and undoes much of the insulation. Magnets, landing on the steel right at the edge, fix that. Two honest caveats, though. First, magnets only grip steel, so the windscreen, which has no steel across its middle, usually still needs metal rods or tucking to hold the centre, magnets alone handle the side windows. Second, strong magnets can damage bank cards, ID, phones and storage media, and matter to pacemakers, so keep them away from wallets and be aware if anyone aboard has a medical device. With those noted, for internal blinds the magnetic versions are generally worth the premium for the better seal and the no-slip hold, which is exactly why "thermal magnetic blinds" is what so many owners search for.
The cab: where you win or lose
It's worth dwelling on the cab, because it's where most of the heat is lost and gained, and where the standard purchase, that three-piece set, does most of its work. The windscreen and the two cab side windows are a vast area of single-glazed (or barely-glazed) glass, uninsulated and cold, sitting right at the front of your living space. On a winter night, an unscreened cab is like leaving a window open; on a summer morning, it's a solar oven. Cover it well and the difference to both warmth and morning lie-ins is dramatic.
For most owners, a three-piece internal cab set is the sensible first buy: affordable, effective enough, discreet and dry-stowing, it transforms the cab from the van's weak point into something manageable. If you camp in genuinely cold conditions and condensation is your enemy, an external cab screen is the upgrade that most improves things, at more cost and with the wet-packing and security trade-offs. And the keen, cold-weather owner often has both: an external screen for the worst nights, an internal set for everyday and for stealth. Whichever you choose, the cab is the priority, do the cab before anything else, because it's where the biggest, cheapest gains are. Get a good three-piece set on the cab and you've solved the majority of a van's thermal problem in one purchase.
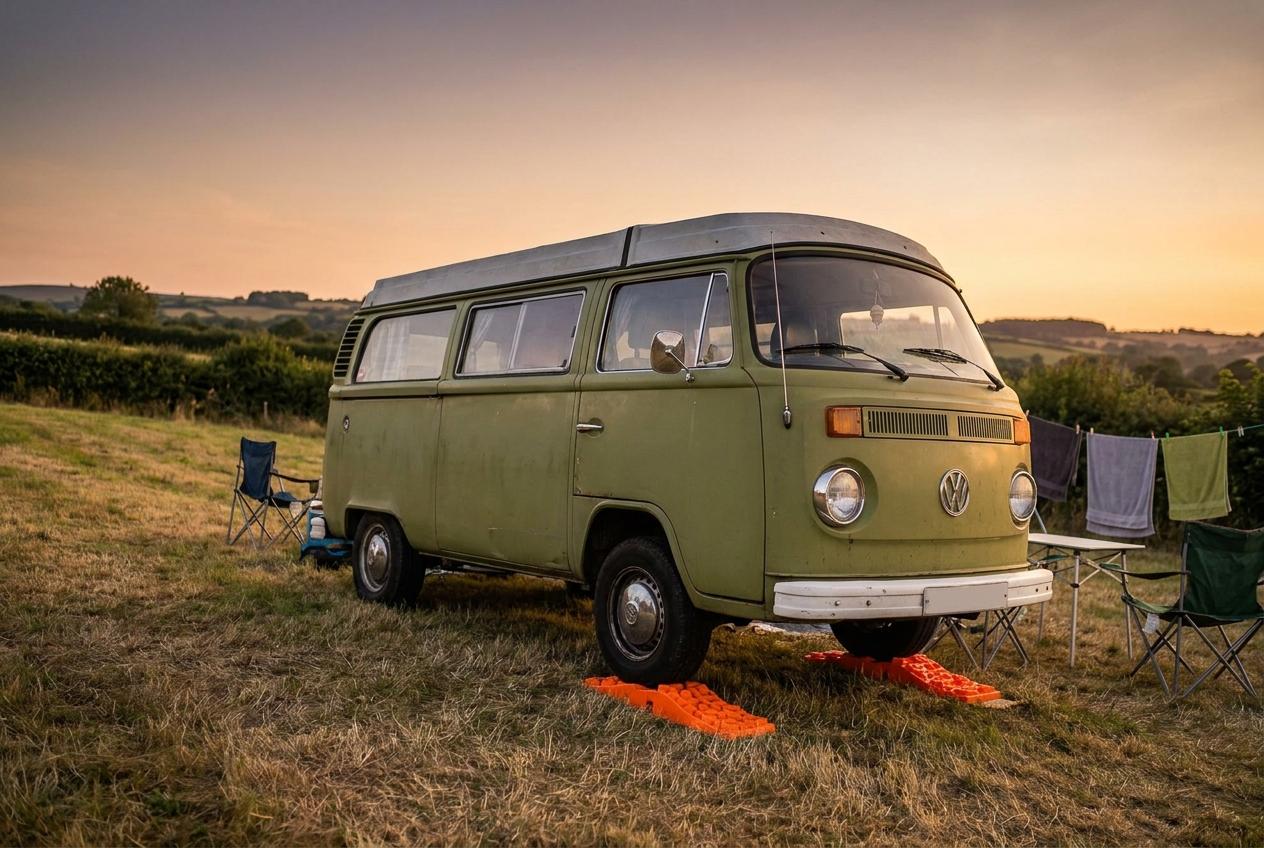
The pop-top roof: the cold spot
If your van has an elevating, or pop-top, roof, here is the thing nobody tells you until the first cold night: the pop-top is the coldest part of the van by far, and it's exactly where your head is when you sleep up there. The reason is simple. The elevating roof's sides are made of canvas or fabric bellows with little or no insulation, a single thin layer between you and the night air, so while the heating keeps the living space below warm, the bed up top is pressed against the cold, and condensation gathers on the inside of the canvas. Anyone who has slept in a pop-top in spring or autumn knows the damp, chilly feeling, and the puddles on the canvas in the morning.
There are two ways to tackle it, and they mirror the internal-versus-external split. Internal pop-top insulators are insulating pads that fit inside the raised roof, attaching (usually by Velcro) to the inside of the canvas and staying in place when the roof is lowered. The best known is Brandrup's ISO-TOP, which is genuinely effective but not cheap, from around £504 depending on your roof and model, and there are UK custom makers such as ProudtoPop. External pop-top covers, or wraps, go over the outside of the raised canvas: Vanshades makes an insulated pop-top wrap (around £395 to £450), and Comfortz makes one for VW vans (around £300 to £350). Externals add a still-air gap and keep the cold and dew off the canvas, which helps both warmth and condensation, but they must usually be removed before you lower the roof, and they get wet.
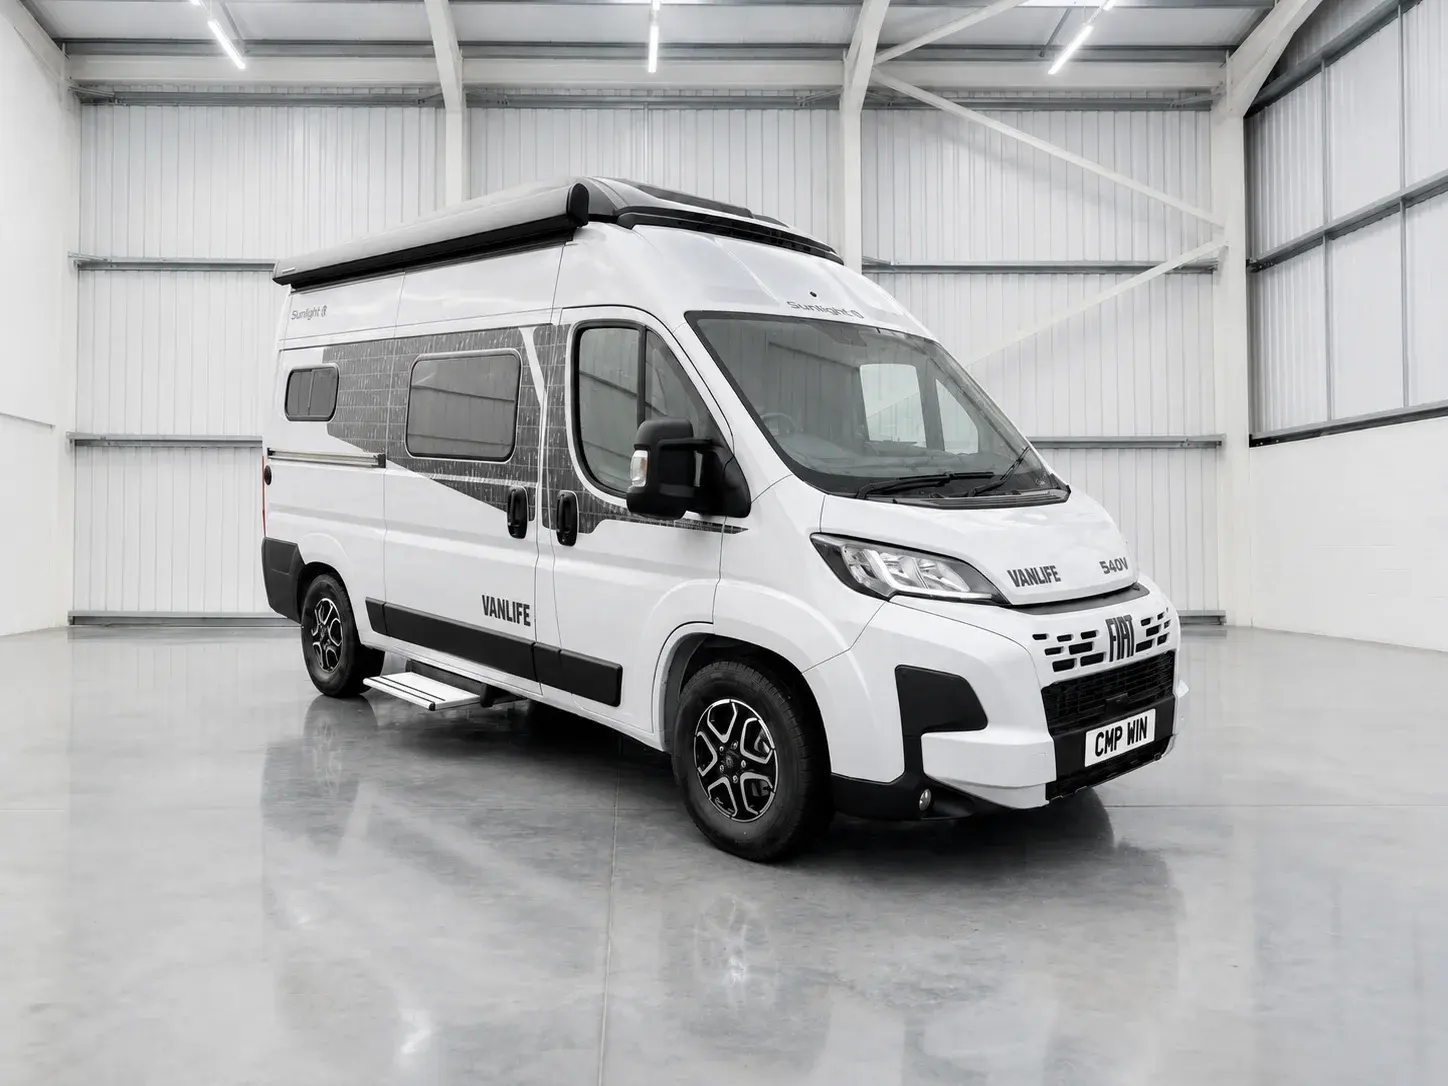
A quick but important correction, because it's a common muddle: Brandrup's ISO-TOP is the pop-top insulator. Brandrup's "iXTEND" is something different, a fitted sheet for the pop-top bed mattress, not insulation, so don't buy one expecting it to keep you warm. If you want pop-top insulation from Brandrup, it's ISO-TOP you're after. The bottom line on pop-tops: if you'll use the elevating roof in cold weather, some form of pop-top insulation is the difference between a miserable, damp night and a cosy one, and it's the upgrade pop-top owners most often wish they'd bought sooner. We talk more about living with a pop-top through the seasons in our guide to living with a Sunlight Vanlife 540, which has a permanent pop-top.
Habitation windows and the rest of the van
Beyond the cab and the roof, the habitation windows matter too, though less dramatically. If your van has proper motorhome-style windows, they usually come with integrated blackout blinds that provide some insulation. If it has simpler glass windows, you can add magnetic blackout-and-thermal blinds, panels that snap over the window aperture to block light, add a little insulation and give privacy. Brands like Kiravans and others make these, and Vanshades makes pre-assembled "window pods" that combine a frame and a blackout blind for VW windows. Per-window magnetic blinds are an affordable way to finish the job after you've done the cab.
One brand clarification worth making, since it comes up: Van-X, which some people associate with thermal screens, actually makes rail-mounted thermal curtains rather than reflective silver-screen sets. They're a legitimate product, curtains that divide and insulate the cab from the living area, but they're a different thing from the foil-and-foam screens this guide is mostly about. If you're after reflective thermal screens specifically, the names to look at are Kiravans, Brandrup, Silver Screens, TaylorMade and the various own-brand sets, rather than Van-X. It's an easy mix-up, and worth getting right so you buy the product you actually mean to.
Brands and what they cost
Here's the brand-and-price picture, with the standing warning that these prices move a lot, with sales, model, window count and (for the German brands) the exchange rate, so treat them as the shape of the market and check before buying.
| Product | Type | Rough UK price |
|---|---|---|
| Kiravans internal cab set (suction) | Internal, 3-piece | ~£45 |
| Kiravans internal cab set (magnetic) | Internal, 3-piece | ~£110 |
| Kiravans external cab screen | External | ~£215 to £235 |
| Brandrup ISOLITE Inside (cab set) | Internal, Velcro | ~€112 (EUR) |
| Brandrup ISOLITE Outdoor (windscreen) | External, Velcro | ~€89 (EUR) |
| OLPRO internal 3-piece | Internal | ~£30 |
| Brandrup ISO-TOP (pop-top insulator) | Internal pop-top | from ~£504 |
| Vanshades pop-top wrap | External pop-top | ~£395 to £450 |
| Comfortz pop-top wrap (VW) | External pop-top | ~£300 to £350 |
For the VW Transporter and California, Kiravans is the clear all-rounder (with that useful magnetic-or-suction choice and its own external screen), Brandrup is the premium German option (ISOLITE Inside and Outdoor, plus ISO-TOP for the pop-top), and OLPRO and Marvix cover the budget end. For the Ford Transit Custom, Kiravans again covers it, alongside OLPRO, the UK-made Fuel Lagoon, and Clearcut, all doing internal cab sets, with prices broadly in the £40 to £90 range for internal sets. For Fiat Ducato-based conversions, Marvix does multi-layer internal cab sets, external zip-opening covers are widely available, and the built-in Remis Remifront cab blinds are a premium factory-style alternative, though, fairly, owners note even those don't fully stop condensation. Across all of them, the cab set is the core purchase and the pop-top insulation the big-ticket extra for elevating-roof vans.
Fitting and looking after them
A few practical notes to get the best from whatever you buy. For internal sets, the windscreen piece is always the awkward one, because there's no steel across the middle for magnets, so expect to use the supplied rods, tuck the edges behind the trim, or wedge it against the pillars, and accept that the windscreen is the fiddliest panel. Make sure the side-window pieces sit right to the edge so there's no gap, this is where magnets earn their keep over suckers, and where light and cold otherwise leak in. Suckers, if you have them, hold far better on clean, slightly damp glass than on dusty dry glass, so a quick wipe helps them stay up overnight.
For external screens, the golden rules are about moisture and wind. They get wet from rain and dew, so dry them before long storage or they'll go mouldy, and never pack a soaking screen away for weeks. In strong wind they can flap or work loose, so in a real blow it's often better to take them off than to listen to them all night. And whatever you have, store them flat or rolled rather than crushed, so the insulation and any magnets aren't damaged. None of this is onerous, thermal screens are low-maintenance, but the two things that ruin them are packing externals away wet and crushing the panels in storage, both easily avoided. Look after them and a good set lasts many seasons.
A note on prices
As with any kit guide, treat every price here as a snapshot. Thermal screens are leisure-trade products with frequent sales, and the figures vary by model, by how many windows your van has, and, for the German brands like Brandrup, by the euro-to-pound exchange rate, since UK resellers price in pounds and differ from the German list. The internal cab sets quoted here run from around £30 for a basic OLPRO set to around £110 for a magnetic Kiravans one; external cab screens around £215 to £235; and pop-top insulation from around £300 for an external wrap to £504-plus for a Brandrup ISO-TOP. Those are the shape of the market rather than a quote. Before buying, price the exact set for your specific van at two or three retailers, and check whether the price is for the windscreen alone or the full three-piece set, the most common source of confusion when comparing.
What's best, and the honest complaints
The UK owner consensus, for what it's worth, lands roughly here: external screens outperform internal for condensation, heat and ease, at the cost of price, wet packing, security exposure and wind; the most respected external makers are the genericised "Silver Screens" and "TaylorMade", with TaylorMade praised for zero condensation below freezing but noted by one owner as a slightly looser fit than Silver Screens and prone to flapping in strong wind. Brandrup is the premium internal-and-external choice, well regarded for the VW California, with price and fiddly Velcro fitting the main gripes. Kiravans is the strong mid-market all-rounder. Vanshades earns good marks for its window pods and pop-top wraps, with price and made-to-measure lead time the trade-offs.
The honest, recurring complaints are worth knowing. Cheap suction internal sets suffer gaps and light leaks where the suckers sit too far from the edge, which is exactly what magnets fix. Weak "flexible magnetic strip" on some budget sets isn't strong enough to hold the blind tight, only proper neodymium blocks do. External screens flap or need removing in strong wind, and come away wet. And the uncomfortable truth that catches people out: internal screens, even expensive ones, do not stop condensation the way externals do, because the glass behind them still goes cold. If condensation is your main problem, that fact should steer you external (or to running both), regardless of how good a particular internal set is. Knowing these failure modes lets you buy around them: magnets not suckers, neodymium not flexible strip, external if condensation is the enemy, and accept that nothing is perfect.
How far into the year? Turning a three-season van into a winter one
It's worth framing what thermal kit actually buys you, because it's more than comfort on the odd cold night, it's months of extra usable van. Most campers are sold and used as three-season vehicles: spring, summer and autumn, with winter left to the brave. The single biggest thing standing between a three-season van and a genuine year-round one is how it handles the cold and the damp, and that's precisely what thermal screens, pop-top insulation and good ventilation address. Get the cab screened, the pop-top insulated and the moisture managed, and a van that was miserable below ten degrees becomes one you can happily use in frost.
That matters because the shoulder seasons and winter are, for many people, the best time to travel: empty campsites, dramatic light, no crowds, cheaper pitches. The owners who get the most out of their vans are usually the ones who've cracked the cold, and thermal kit is the cheapest part of doing so (good heating being the other half). You won't turn a pop-top camper into an Alpine expedition vehicle with a set of screens, the fabric roof has its limits, but you'll comfortably push a three-season van deep into autumn and through milder winters, which for most people is all the year-round they want. Think of thermal screens less as a comfort accessory and more as the thing that unlocks half the calendar.
The whole-van approach: layering for real cold
For genuinely cold trips, the owners who stay warmest don't rely on any single product, they layer. The cab screens stop the biggest heat loss. The pop-top insulator (or a fixed-roof van's better insulation) handles the coldest surface. A thermal curtain drawn across behind the cab seals the living area off from the cold front of the van, shrinking the space you're actually heating, this is what rail-mounted thermal curtains, such as Van-X's, are for. Magnetic blackout blinds on the habitation windows add a little more insulation and privacy. And good ventilation carries the moisture out so all that warmth doesn't turn to damp.
Put together, that layered approach, screens, roof insulation, a cab-divider curtain, window blinds and managed ventilation, is what separates a van that's grim below freezing from one that's genuinely cosy. You don't need all of it for milder camping, the cab set alone does most of the work, but if you're serious about winter, think in terms of a system rather than a single purchase. Each layer is relatively cheap; together they transform the van. And the heating does the rest: thermal kit keeps the warmth in, but you still need a good heater putting warmth out, the screens just mean it has far less work to do and your fuel lasts far longer. The two halves, keeping heat in and putting heat out, are what make a warm winter van.
Making your own thermal screens
For the budget-minded and the handy, thermal screens are very makeable at home, and plenty of self-builders do exactly that. The basic recipe is a reflective foil-bubble insulation (the foil-faced bubble material sold for insulation is the classic choice), cut to the shape of each window, sometimes with a layer of foam or fleece added for more insulation and a softer finish. For the side windows, sew or glue neodymium magnets around the edges so they snap to the steel; for the windscreen, where there's no central steel, you cut the panel to wedge against the A-pillars and tuck under the trim, or hold it with the sun visors.
The appeal is cost: a full set of home-made internal screens can be made for a fraction of even a cheap shop-bought set, and you can tailor them exactly to your van and add as many layers as you like. The honest caveats are that it takes time and patience to template each window accurately (cardboard templates first, then cut), that the result looks homemade rather than tidy, and that you must use proper neodymium block magnets, not weak flexible magnetic strip, for them to hold. But it genuinely works, the physics is the same whoever made it, and for a self-build or a tight budget it's a satisfying way to solve the cab and windows for very little. The same magnet trick works for flyscreens too, as we note in our flyscreens guide, so if you're set up to make one, you can make both.
How to choose
Pull it together and it comes down to your conditions and priorities. If you camp mostly in milder weather and want the best value, a magnetic internal three-piece cab set is the sweet spot: affordable, discreet, dry-stowing, and far better sealed than the sucker version, do the cab first and you've solved most of the problem. If you camp in genuinely cold or damp conditions and condensation plagues you, prioritise an external cab screen for its condensation and thermal performance, accepting the cost and the wet-packing, and consider keeping an internal set too for stealth and everyday use. And if you have a pop-top and use it outside high summer, budget for pop-top insulation (internal ISO-TOP-style or an external wrap), because the roof is the cold spot and no amount of cab screening fixes it.
The order of priority, for almost everyone, is: cab first (biggest, cheapest gain), then the pop-top if you have one and use it in the cold, then the habitation windows to finish. Choose magnetic over suction for internal blinds if the budget stretches, choose external over internal if condensation is your particular battle, and don't expect any single product to do everything. Match the kit to where and when you actually camp, spend first where the heat is actually lost, the cab and the pop-top, and a thermal setup transforms a van from a three-season fair-weather thing into something you can genuinely enjoy in the cold. It's one of the upgrades that, more than almost any gadget, changes how far into the year you can comfortably use your van.
Frequently asked questions
Are internal or external thermal screens better for a campervan?
External screens are better for condensation and outright thermal performance, because they keep the glass itself warm so moisture can't condense on the inside. Internal screens are cheaper, more discreet (no external cover advertising the van), stay dry when you pack them, and aren't affected by wind, but the glass behind them still goes cold, so they don't beat condensation as well. Many cold-weather owners use both. Choose external for condensation and warmth, internal for value, security and convenience.
Are magnetic thermal blinds worth the extra over suction?
Usually yes. Magnetic blinds cost roughly double the suction version (around £110 versus £45 for a typical cab set), but they hold firmly without dropping off in the cold and pull the edges tight to the bodywork, closing the gaps where light and cold leak in, which is the main complaint about cheap suction sets. The caveats: magnets only grip steel (so the windscreen still needs rods or tucking), and strong magnets can harm bank cards and matter to pacemakers, so keep them clear of wallets and medical devices.
How do you insulate a pop-top roof?
Two ways. An internal insulator (like Brandrup's ISO-TOP, from around £504, or a UK custom maker) is an insulating pad that Velcros to the inside of the raised canvas and stays in when the roof is lowered. An external wrap (like Vanshades at around £395 to £450, or Comfortz at around £300 to £350) goes over the outside of the raised canvas, adding a still-air gap and keeping dew and cold off, but must usually be removed to lower the roof. Either is worth it if you use the pop-top in cold weather, because the canvas roof is the coldest part of the van.
Do thermal screens stop condensation?
External screens largely do, by keeping the glass warm so moisture can't condense on the inside. Internal screens help but don't fully stop it, because the glass behind them still goes cold and damp cabin air still reaches it, even expensive internal and built-in blinds are reported by owners not to stop condensation. So if condensation is your main problem, fit external screens (or run internal and external together) and ventilate the van, a cracked roof vent or window overnight, rather than relying on internal blinds alone.
What's the difference between Brandrup ISO-TOP and iXTEND?
They're often confused. ISO-TOP is the pop-top roof insulator, an insulating pad for the inside of the elevating roof canvas. iXTEND is a fitted sheet for the pop-top bed mattress, bedding, not insulation. If you want to keep the pop-top warm, you want ISO-TOP; iXTEND just makes the bed up there nicer to sleep in. Don't buy one expecting the other.
Do I really need thermal screens, or will curtains do?
Curtains help with privacy and a little insulation, but they're not a substitute for proper thermal screens on the cab, which is where most heat is lost through that big area of glass. The most effective setup is both: reflective thermal screens on the cab and windows to stop heat loss through the glass, plus a thermal curtain drawn across behind the cab to seal off the living area. If you only buy one thing, make it a cab thermal set, not curtains; if you camp in real cold, add the curtain too.
Can you use thermal screens in summer?
Yes, and they're genuinely useful then. The same screens that keep heat in on a winter night reflect the sun's heat out on a summer morning, stopping the cab becoming a greenhouse and keeping the van cooler and more sleepable. External screens are especially good at this because they stop the heat at the glass. So thermal screens aren't just a winter buy, they earn their keep in a heatwave too, which is part of why they're such good value: you use them at both ends of the year.
Will thermal screens keep a campervan warm without heating?
No, and it's important to be realistic: thermal screens slow heat loss, they don't generate heat. On a cold night they dramatically reduce how fast warmth escapes (and how hard your heater has to work), but you still need a heat source, a diesel or gas heater, to stay genuinely warm. Think of screens as the insulation and the heater as the warmth: together they're excellent, but screens alone will only ever keep the van a bit less cold than it would otherwise be, not warm.
How much do campervan thermal screens cost?
Internal cab sets run from around £30 for a basic three-piece set to around £110 for a magnetic one; external cab screens are roughly £215 to £235; and pop-top insulation ranges from about £300 for an external wrap to £504 or more for a premium internal insulator like Brandrup's ISO-TOP. Per-window habitation blinds are typically £25 to £60 each. Prices vary a lot by van, model and retailer, and the German brands shift with the exchange rate, so check two or three sellers and confirm whether a price is for the windscreen alone or the full set.
What's the single most important thermal upgrade for a campervan?
A good cab thermal set, every time. The windscreen and cab windows are the biggest area of uninsulated glass and the van's main thermal weak point, so screening them, ideally with a well-sealed magnetic internal set, or an external set if condensation is your battle, delivers the biggest improvement for the least money. After the cab, pop-top insulation is the next priority if you have an elevating roof and use it in the cold. Do those two and you've addressed the van's two coldest spots.
The reachable bit
Thermal screens are one of those quietly transformative upgrades: get the cab and the pop-top right and you go from shivering in spring to comfortable, dry and warm, with the van usable months longer each year. They're also, happily, an affordable transformation, a few hundred pounds turns a three-season van into a near-all-year one. The van itself is the part that isn't affordable, and that's the whole reason Campervan.win exists.
We give away a Sunlight Vanlife 540 V, a clever, well-built camper you can read about in our full review. A van like that costs north of £60,000, out of reach for most of the people who'd love one, and closing that gap is the point: capped entries so the odds stay honest, £10 a ticket, a maximum of five per person, £500 to a UK charity from every full draw, the winner picked by a public randomness beacon anyone can re-check, and one person driving away in the van itself. Add the thermal screens, the flyscreens and the rest once it's yours. The keys are the hard part, and that's the bit we're trying to make reachable.
Enjoyed this post?
Get more honest campervan guides like this one in your inbox.
You’re in!
Check your inbox. We’ve just sent you a welcome email.

About the author
Martha
Martha writes about interiors, ownership stories, and the everyday realities of campervan life, with a focus on comfort, cost, and how vans are used over time.
Keep Reading
Related Reading
Thoughtful articles that build on what you’ve just read.
Campervan Kit & Gear
24 min read
Campervan leveling options: what's best, what's best value, and what should you choose?
A plain-English, in-depth look at every way to level a campervan or motorhome on a sloping pitch, from £20 ramps to fully automatic hydraulic systems, with honest UK prices and advice on which one actually suits you.
Campervan Kit & Gear
27 min read
Lock'n'Level review: a great little tool, and why a smart 'Pro' version makes sense
An honest, hands-on look at the Lock'n'Level levelling system, what it does brilliantly, where it falls short, and why an app-connected electronic version with auto-levelling would be a natural next step.
Campervan Kit & Gear
25 min read
ARB awning vs Thule awning: one's for 4x4s, one's for campervans
ARB and Thule both make excellent awnings, but they're built for different vehicles and different lives. One is a rugged, rack-mounted pull-out for 4x4s and overlanders; the other is the wind-out cassette awning that defines campervan and motorhome touring. Here's how they really compare, and which one you actually want.
Campervan Kit & Gear
25 min read
Is ARB worth it? The 4x4 gear, honestly reviewed
ARB is the Australian 4x4 giant whose lockers, suspension, fridges and awnings turn up on the world's most serious overland vehicles. But is it worth the premium for a UK campervan or 4x4 camper owner? Here's an honest review of the standout ARB kit, what to skip, and what it really costs.