Design, Layout & Living Space
Carpet vs felt vs wood: the honest guide to campervan interior linings

Written by
Martha
Martha writes about interiors, ownership stories, and the everyday realities of campervan life, with a focus on comfort, cost, and how vans are used over time.
The short answer
For campervan interior linings there is no single best between carpet, felt and wood; the right one depends on how you use the van, and the lining is the last layer, not the strategy, since what sits behind it decides how the van actually behaves. Carpet is the cosy, forgiving, cheap default that moulds beautifully around curves. Felt is the quietly winning middle option, lighter and cleaner with a documented acoustic and fire rating. Wood looks best and wipes clean but adds weight and labour. The reassuring part is that none is a wrong answer. A DIY carpet or felt lining is cheapest at roughly £100 to £225 in material, while professional fitting is around £575 to £750 for a Transporter-sized van. Here is how to choose the right one for how you travel.
The lining is the part of a campervan you touch and look at more than almost anything else. It's the surface your hand brushes when you reach for the light, the thing your eye settles on while the kettle boils, the backdrop to every photo you'll ever take of the van. Get it right and the inside feels calm and finished and like somewhere you want to be. Get it wrong and the nicest layout in the world feels like a panel van with a bed in it.
And yet the lining is also quietly doing a job you never see, helping with warmth, soaking up road noise, and either coping with or quietly trapping the moisture that every camper interior generates. So choosing between the big three, carpet, felt and wood, is one of the most agonised-over decisions in any build, and the honest answer is that there isn't a single best one. There's a best one for how you'll actually use the van, and a couple of myths worth clearing out of the way first. Here's the practical, no-spin version.
First, the thing nobody tells you: the lining is the last layer, not the strategy
Before we compare materials, one point that matters more than which one you pick: the lining is the visible skin, but how your van behaves is decided by what's behind it.
The build order in a good conversion runs bare metal, then mass sound-deadening (the heavy butyl pads), then insulation, then your vapour strategy, and only then the batten and the lining you see. The lining sits on top of all that. So when a supplier tells you carpet "adds insulation," take it with a pinch of salt, because the real warmth comes from the layer underneath, not the few millimetres of fabric on the surface.
Two rules flow from this, and they apply whatever lining you choose. First, never fix any lining or insulation straight onto bare, cold metal. Warm, humid air from breathing, cooking and drying clothes hits the cold steel behind it, condenses, and you get damp, rust and mould you can't see until it's a problem. Insulate properly first. Second, ventilation beats everything. A roof vent or fan that actually removes moisture does more for a dry, healthy van than any lining choice. Keep those two in mind and the rest is about look, feel, weight and upkeep.
It's worth knowing the two honest schools of thought on that hidden layer, because your lining should suit whichever you follow. One is the sealed approach: a continuous, properly taped vapour barrier on the warm side of the insulation to stop interior moisture ever reaching the cold metal. It works brilliantly if it's genuinely continuous, and poorly if it's half-done, because a leaky barrier traps moisture behind it, which is often worse than none at all. The other is the breathable approach: moisture-tolerant insulation like sheep's wool that can absorb and release humidity, paired with serious ventilation, letting the structure get slightly damp and dry out again. Both work; what matters is committing to one and not half-doing either. And mind the battens, the timber strips you screw to the van's ribs to fix the lining to, because they conduct cold and can cause damp spots if you're careless. None of this shows once the lining's on, which is precisely why it's the part people skimp on and later regret.
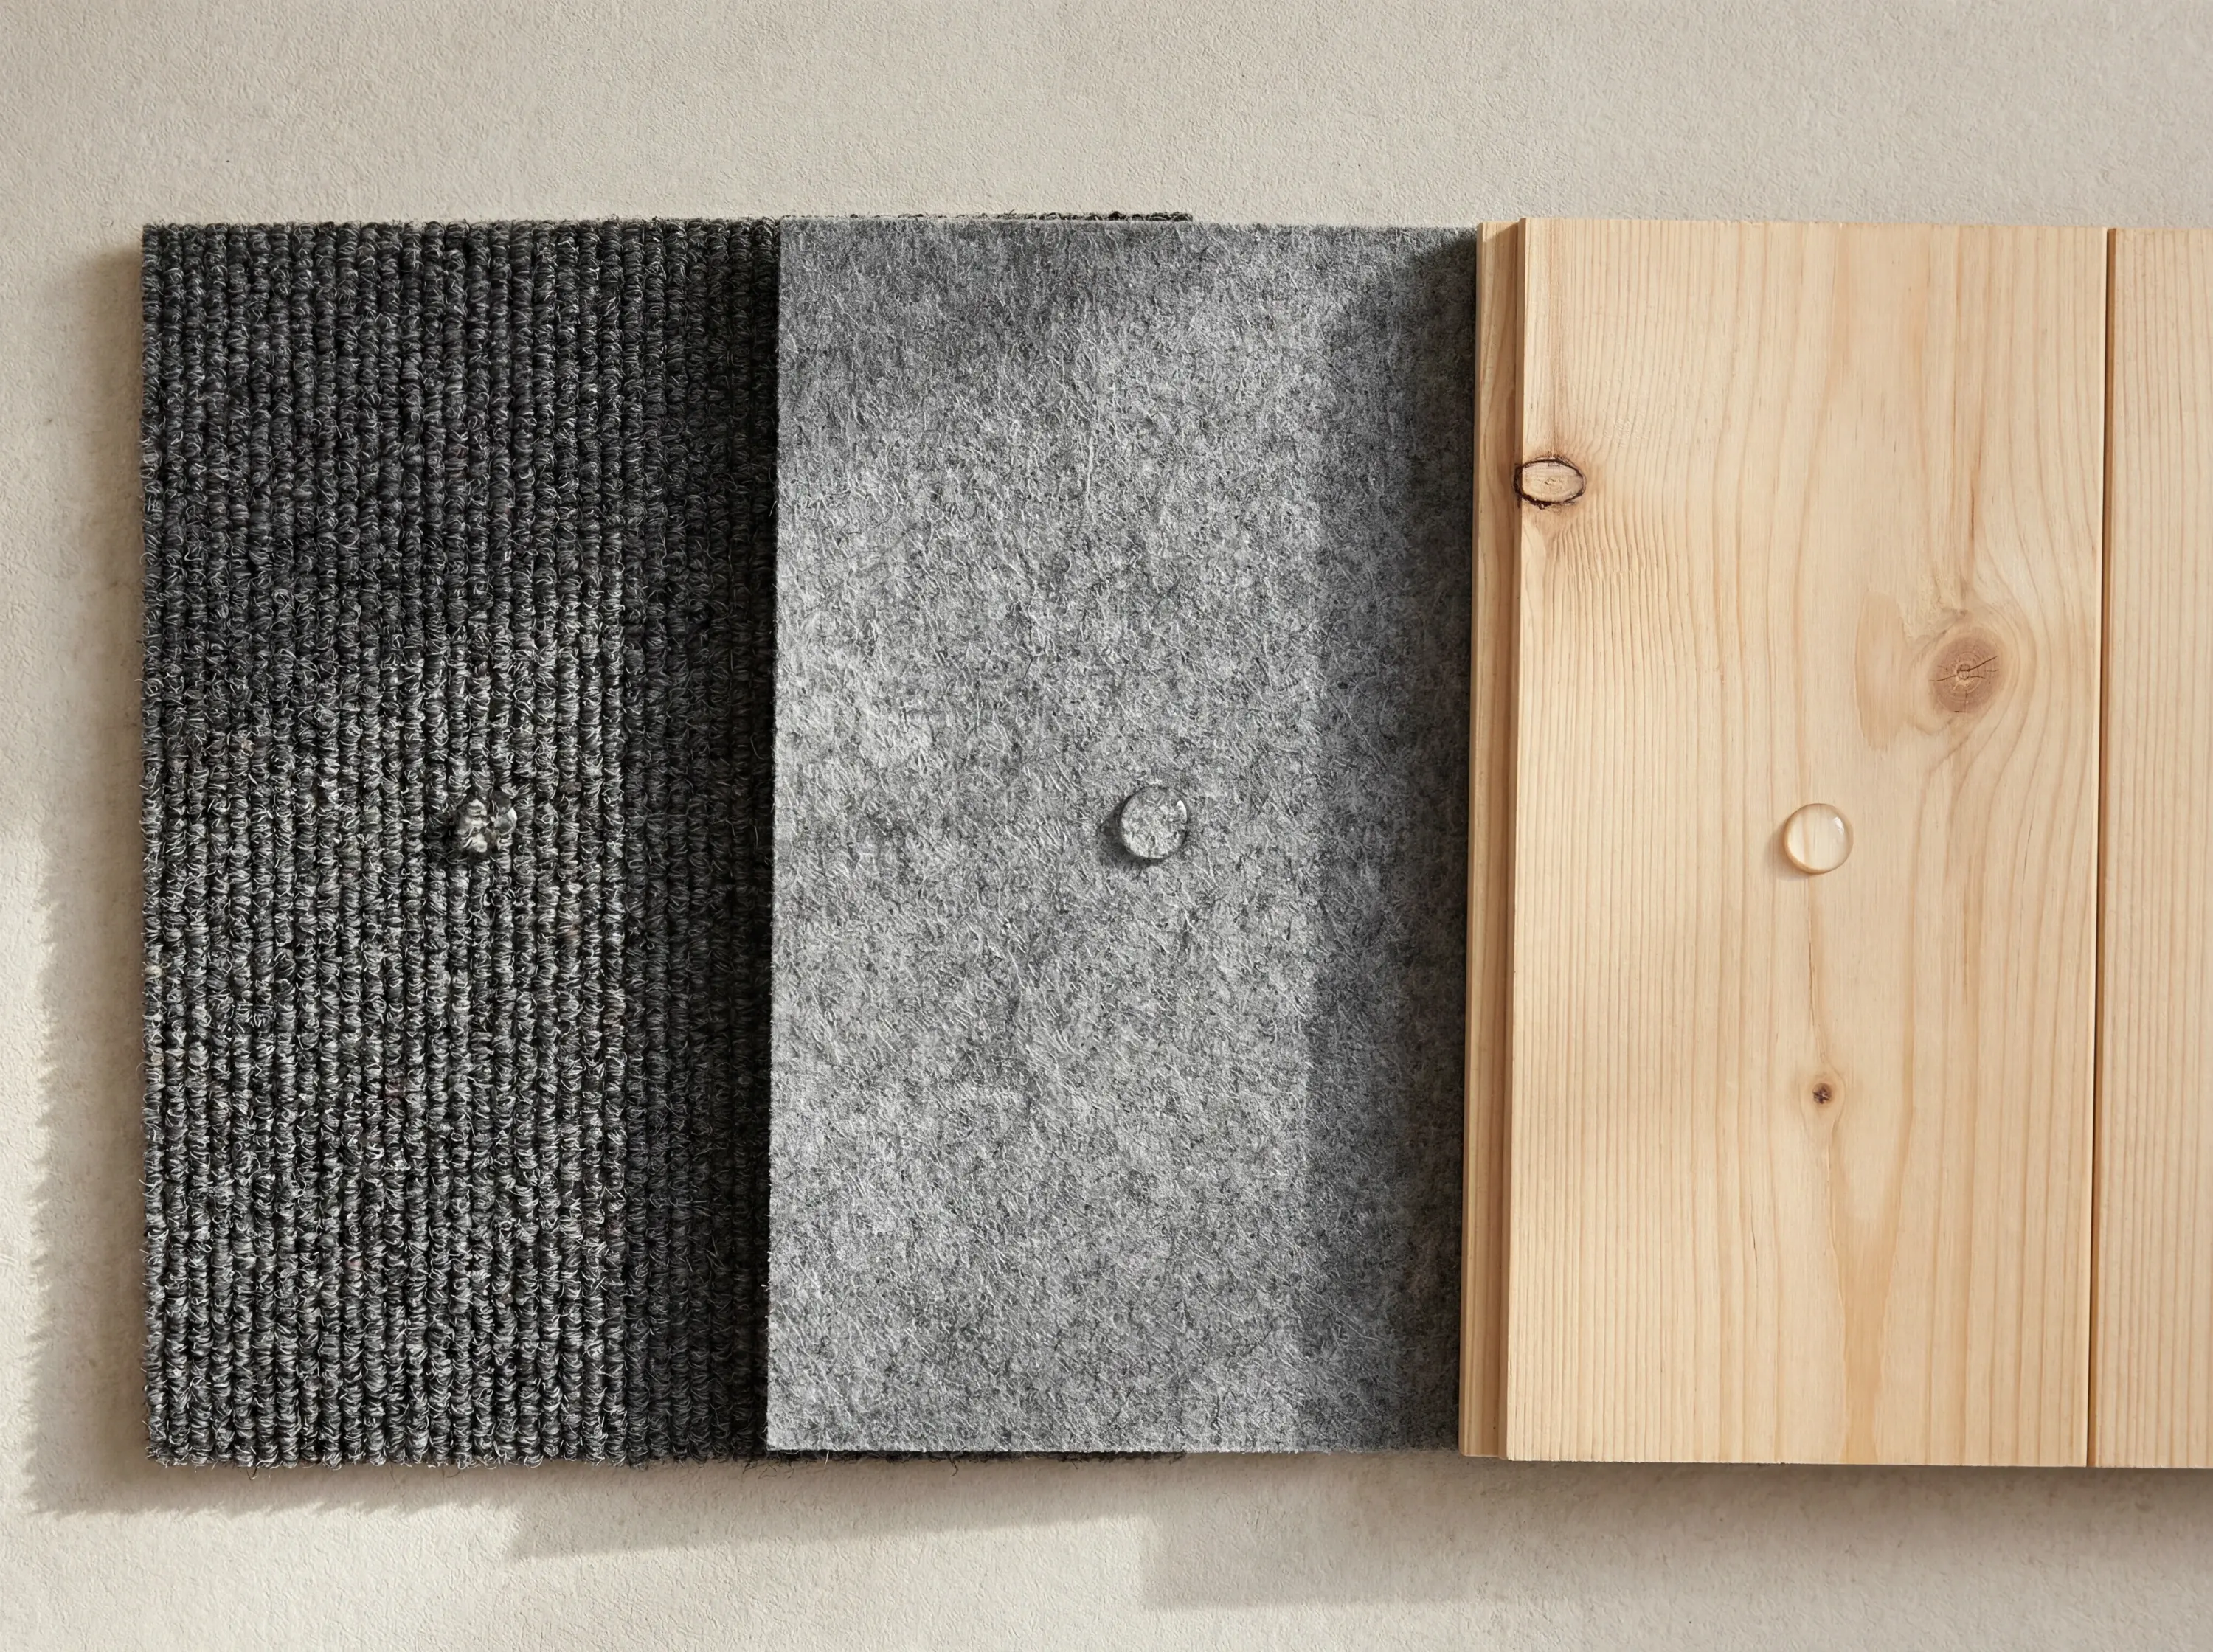
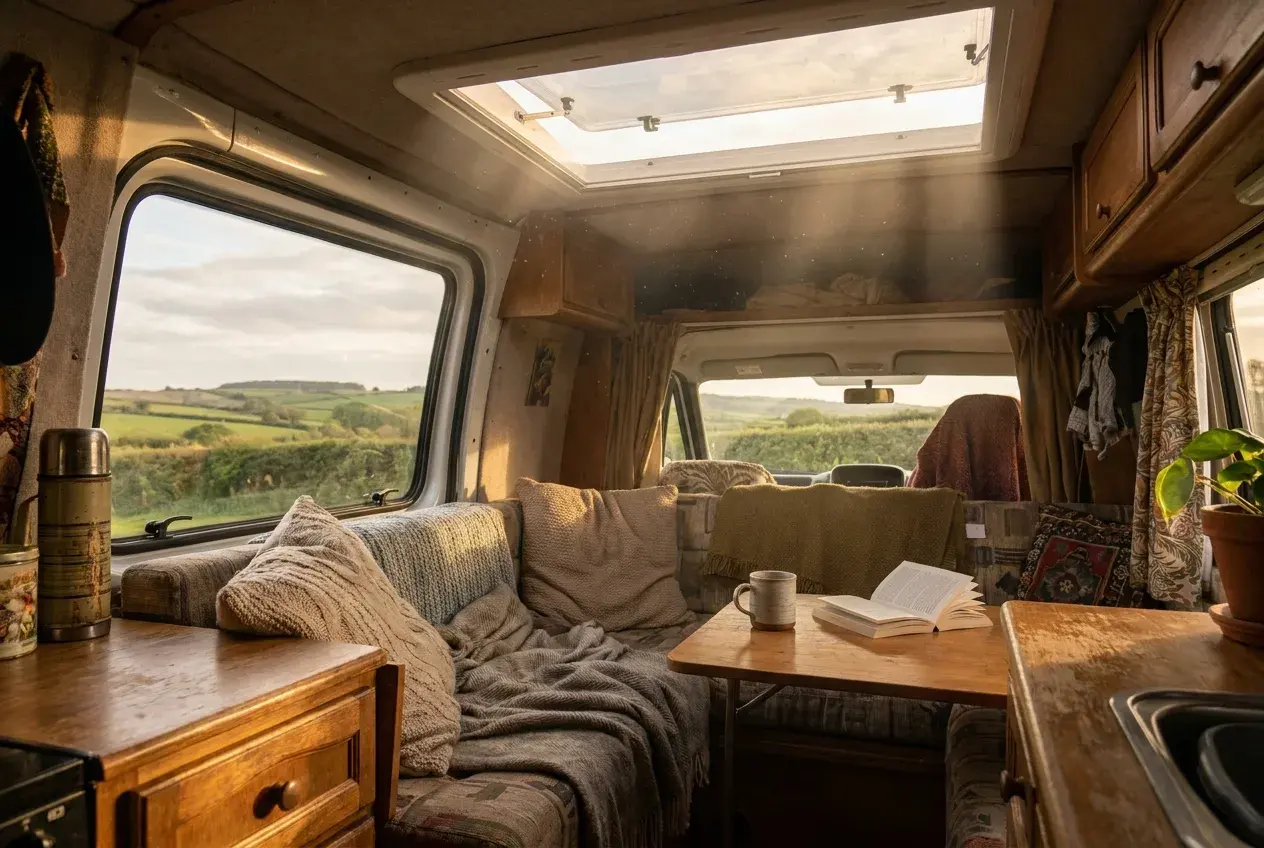
Carpet: the cosy, forgiving default
This is the stretchy, short-pile automotive carpet most people picture in a VW conversion, and it's the incumbent for good reason. There's a cheaper generic "4-way stretch" grade and a plusher branded velour like Veltrim, and both mould beautifully around the awkward curves of a van.
The look and feel are soft, warm and instantly "finished". Carpet hides minor lumps and imperfections in the panels behind it, which is forgiving for a first build, and it comes mostly in greys, charcoals and blacks. Stick to darker shades; light carpet shows every smudge within a fortnight.
Cost is carpet's friend. The material runs roughly £10 to £15 a metre off a two-metre-wide roll, and you'll need somewhere around 10 to 12 metres for a small van or 15 for a long one, so the raw materials land around £100 to £225, plus adhesive (and budget properly for that, you need a lot of high-temperature spray glue). Having it done professionally typically costs somewhere in the region of £575 to £750 for a Transporter-sized van. One honest warning on quotes: some "lining" packages priced at £1,200 to £1,900 are actually full insulate-and-line jobs including ply and sound-deadening, not carpet alone. Compare like with like.
Weight is barely worth mentioning, which is the point. Van lining carpet is only around 370 grams per square metre, so the whole job adds a handful of kilos. On a weight-limited van, that matters.
On insulation, here's the myth-bust: thin van carpet adds almost nothing thermally. It's three or four millimetres of fabric. It's there for looks and sound, not warmth, and anyone selling it as serious insulation is overstating it. On sound, though, it genuinely earns its place as a soft absorber that calms panel drumming and road noise, which is exactly why so many people love how a carpeted van feels to travel in.
The downsides are about moisture and cleaning. Carpet absorbs and holds damp, and over time, especially in a van used for wet, sandy, doggy, outdoorsy life, it can start to smell. You can't wipe it clean; you brush, vacuum and spot-clean, and it traps hair and dust. And the classic carpet failure is cheap, non-heat-resistant adhesive letting go in hot weather so the lining sags and peels. Use proper high-temperature glue and that mostly goes away.
Fire and DIY: reputable van carpet is fire-rated (you'll see standards like FMVSS 302 or ECE 118), though bargain unbranded rolls may not be, which is worth checking. And it's the easiest lining to fit, full stop. Four-way stretch moulds around wheel arches and pillars with no joins, cuts with scissors, and forgives beginners. It's the reason carpet is the default DIY choice.
Best for: budget builds, first-timers, vans with lots of curves, and anyone who wants warmth and quiet and doesn't drag the outdoors back inside too often. Just buy decent carpet and the right glue.
Felt: the quietly winning middle option
Needle felt, sometimes sold as "Superflex" or similar, is the flatter, denser, more matte cousin of carpet, and it's steadily taking carpet's crown among people who've done their homework. Often the same suppliers sell both.
The look is more modern and OEM-like than carpet's fuzz, a flat, slightly suede-like matte finish that reads as contemporary rather than shaggy. It pairs especially well with wood accents, which is part of why it's quietly become the go-to backdrop for the pale-ply look, giving you the modern, calm feel without the weight or the fitting headache of cladding an entire van in timber. For a lot of builders, that combination, felt walls with a few well-chosen wood features, is the sweet spot. The cost is broadly the same as cheap carpet, and a professional fit costs about the same too, since the labour is similar.
Where felt pulls ahead is in the detail. It's lighter than carpet, around 300 grams per square metre, so even better for payload. It's anti-static, so it attracts noticeably less dust, a small thing you'll appreciate every time you wipe down the van. It carries a strong, documented acoustic rating (one common product quotes a 10 decibel impact-sound reduction), so it's at least as good as carpet for keeping the road quiet. It's breathable, which helps it cope with moisture a little better than carpet's spongey pile. And it's easy to point to a hard fire certificate (you'll see EN 13501-1 Bfl-s1), which matters if you want documented safety.
The trade-offs are minor. It's still a fabric, so it isn't wipe-clean and it can still absorb moisture if the build behind it is wrong. It's a touch less stretchy than the very stretchiest carpets on the tightest compound curves. And if you specifically want plush, soft, cosy-to-the-touch, velour carpet still wins on that.
Best for: anyone who wants carpet's easy fitting and quietness but a cleaner, more modern, lower-dust finish with an easy fire cert. If you're torn between carpet and felt, felt is the quietly smart-money choice.
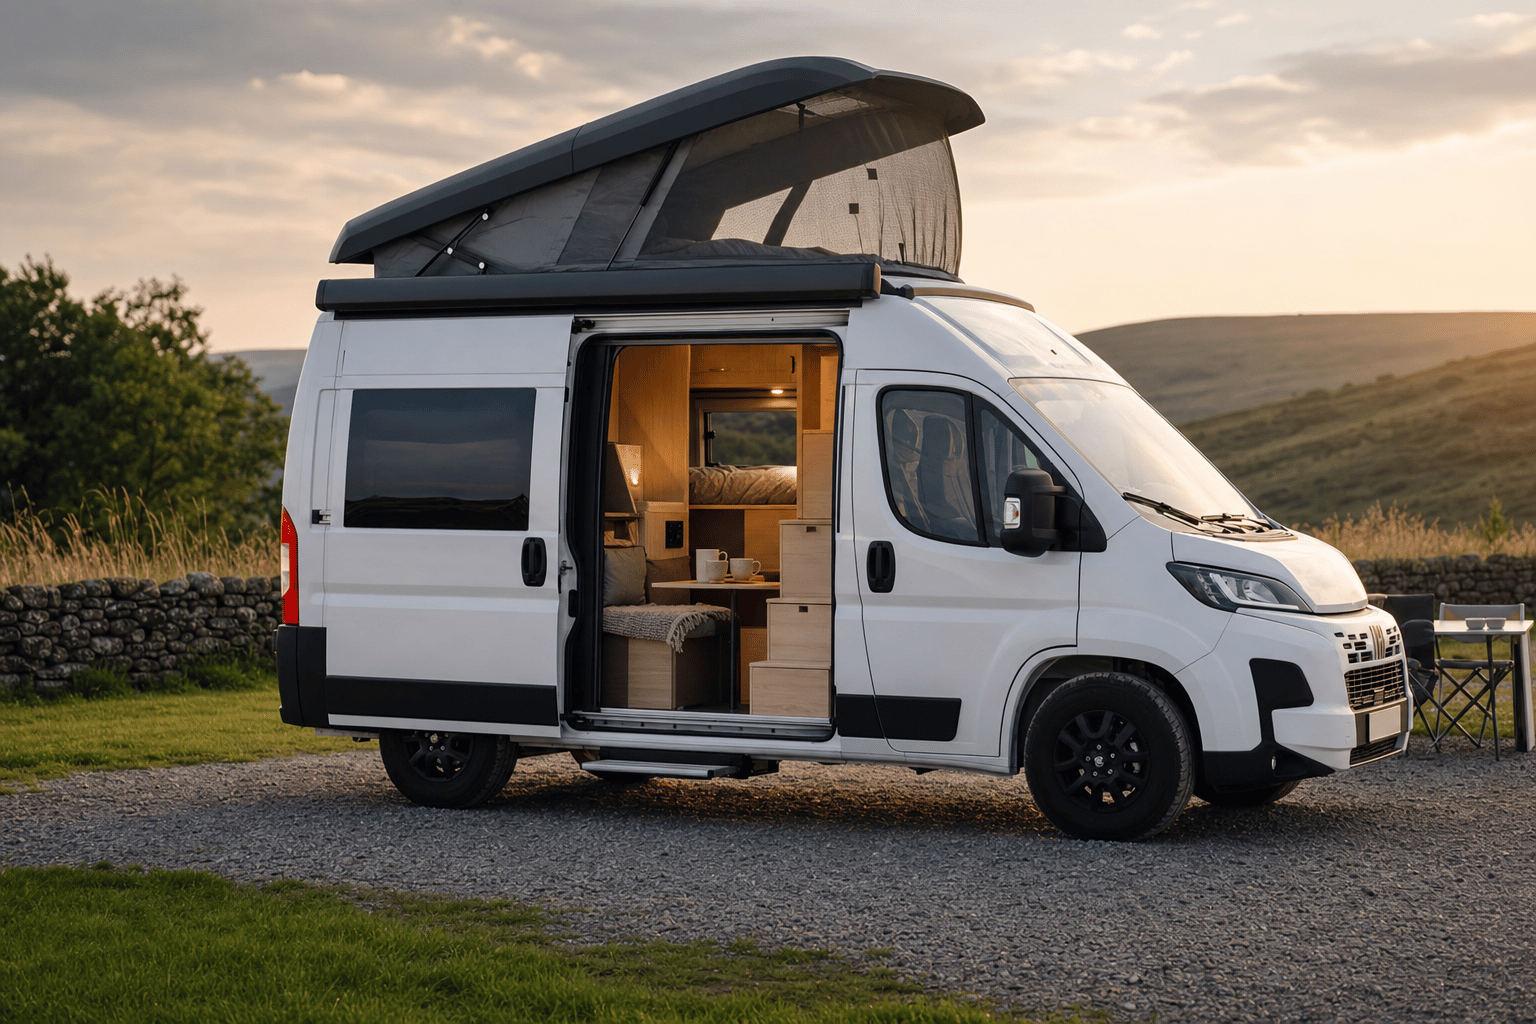
Wood: the looker, with strings attached
Wood is the design-led, photographs-beautifully finish, and it's the current darling of the build world. It comes in three quite different flavours: tongue-and-groove cladding for a warm cabin look, sheet plywood (especially pale birch ply with its striped edges left exposed) for the minimalist Scandinavian look that's everywhere right now, and painted ply for a bright, fresh, airy white finish.
The look is the whole reason people choose it, and it's genuinely lovely. Birch ply in particular has become the aspirational finish, calm and pale and modern. And on cleaning, wood wins outright: sealed, varnished or painted timber and laminate are properly wipe-clean, which is a real, daily advantage for messy, wet, family or dog-filled life.
But be clear-eyed about the costs, because there are three.
Weight is the first. Wood is far and away the heaviest option. Tongue-and-groove especially adds tens of kilos to a long van, which is a genuine consideration on a 3.5-tonne van where payload is precious. (Many builders use thin ply behind cupboards and in hidden areas specifically to claw back weight.) As raw material it can be cheap, people have clad a whole van in pine cladding for under £100, but the labour is the catch: it's the slowest, fiddliest finish to fit well, and professional wood interiors run into the thousands.
Sound is the second. Hard wood surfaces are the worst of the three for noise; they can sound drummy and echoey unless there's good butyl sound-deadening underneath. A real trade-off for the look.
And damp is the third, and the most important. Wood is organic; it can rot and grow mould if it gets damp and can't dry out. Here's the paradox to understand: sealing both faces of a ply panel protects the wood itself, but a sealed panel against a cold cavity can trap condensation behind it, against the metal, where you can't see it, and that's often worse than doing nothing. The answer is to get the insulation and vapour strategy right, treat and seal the timber properly, and above all ventilate. Done right, a wood interior lasts beautifully. Done carelessly, the failure isn't wear, it's hidden moisture.
One more note: bare timber and ply have no inherent fire rating, unlike the certified fabrics, so fire-retardant board or coatings are worth considering.
Best for: birch ply suits modern, design-led builds chasing that Scandi look and strong resale; tongue-and-groove suits cosy-cabin lovers with patience (not first-timers in a hurry); painted ply is the bright, budget-friendly, easy-to-touch-up option. Just commit to doing the moisture side properly.
What you'll really spend
It helps to think in whole-job terms, because the lining material is rarely the big number.
A DIY carpet or felt lining is the cheapest finished result by far: roughly £100 to £225 in material for the walls and ceiling, plus a surprising amount of high-temperature adhesive (budget another £40 to £80), and a couple of days of your time. Have it done professionally and you're looking at around £575 to £750 for a van of Transporter size, which buys you a neat, no-bubbles finish and someone else's weekend.
Wood looks cheap on paper, you can buy enough cladding for a long van for a hundred-odd pounds, but the real cost is hours, plus battens, screws or clips, knotting solution, primer and varnish or paint, and ideally fire treatment. A professionally fitted wood interior is a different order of money again, comfortably into four figures, because it's slow, skilled joinery.
Then there are the costs that apply whatever you choose and that people forget: the butyl sound-deadening underneath (especially important under hard wood), the insulation itself, and a roof vent or fan. Those aren't strictly lining costs, but they're the difference between a van that's quiet, warm and dry and one that drums, sweats and smells. Spend there before you spend on a fancy finish.
The honest comparison, at a glance
| What matters | Carpet (4-way stretch) | Needle felt | Wood (ply / T&G) |
|---|---|---|---|
| Material cost | Low (£100 to £225 DIY) | Low (similar to carpet) | Low material, high labour |
| Professional fit | ~£575 to £750 | ~£575 to £750 | Often into the thousands |
| Weight | Very light | Lightest | Heaviest by far |
| Real insulation | Negligible | Negligible | Slight |
| Sound damping | Good | Best (documented) | Worst (can be drummy) |
| Damp behaviour | Absorbs, can smell | Breathes, anti-static | Rot risk; can trap moisture if sealed |
| Cleaning | Hardest | A little easier | Best (wipe-clean) |
| DIY ease | Easiest | Very easy | Hardest (curves especially) |
| Fire certificate | Usually (check) | Yes (easy to find) | None inherent |
| On-trend? | Declining | Rising | Peak right now |
The other options worth knowing
The big three aren't the only finishes, and the best builds rarely use just one.
Vinyl or leatherette panels (foam-backed and stretched over board) give a premium, automotive or yacht-like look that's fully wipe-clean and water-resistant, ideal for accent panels, headboards and door cards, or for the splash-prone zones. They're heavier and fiddlier to make, and can look plasticky if you go cheap, so most people use them as accents rather than everywhere.
Laminate-faced ply (furniture board) is mostly used for cabinets and the kitchen, where its hard, wipe-clean face copes with steam and daily cleaning. Lightweight birch-ply furniture board sold for campers keeps weight down while giving you a finished surface with no painting, and the exposed birch edge suits the Scandi look nicely.
Foam-backed headlining fabric is the soft, stretchy material used on factory ceilings. It's light and easy to glue over curved roof panels where wood is awkward, and gives an OEM-style soft headliner, though it can sag over the years if the adhesive fails and it isn't wipe-clean.
What the professionals actually do
Here's the reality that cuts through the carpet-versus-wood debate: almost nobody uses one material everywhere. Walk through the better conversions and you'll see a hybrid. Carpet or felt goes on the awkward, curved areas, around wheel arches, window surrounds and the lower walls where flexibility matters. Wood or painted ply goes on the flat feature walls and the ceiling, where it looks its best and is easiest to fit. And wipe-clean laminate goes in the kitchen and wet zones, where it has to earn its keep.
That's not a compromise, it's the sensible answer. You get carpet's quiet and easy curves, wood's looks and wipe-clean practicality, and you put each where it's strongest. The trend, for what it's worth, is real: pale birch ply dominates the aspirational end and felt is steadily replacing carpet at the practical end, squeezing wall-to-wall carpet from both sides. But carpet isn't dead; it's still the most-fitted finish on VW day-vans and the easiest DIY route, and that's not changing soon.
Fitting it: the tips and the mistakes to avoid
A few hard-won pointers, whichever material you land on.
For carpet and felt, use a proper high-temperature spray or contact adhesive, not whatever's cheapest, because ordinary glue softens in a hot van and your lining sags and peels, which is the single most common carpet failure. Clean the panels with a tar-and-glue remover first so the adhesive actually grips, apply it in a crisscross pattern, and smooth from one edge to push the bubbles out. And resist light colours unless you enjoy seeing every mark.
For tongue-and-groove, batten out the walls first, work in one direction, and tap the boards together with an offcut so you don't split the delicate tongues; clips give you a tidy, screw-free finish. For sheet ply, make cardboard templates of the curved walls before you cut, because rigid board is unforgiving of a mis-measure, and expect to make relief cuts to coax it around bends. Seal, knot, prime and paint or varnish timber before or as you fit it, and remember bare wood brings no fire rating with it.
The universal mistakes are worth saying plainly, because they're the ones that cost people their weekends twice: lining over uninsulated metal; a half-sealed vapour barrier that traps damp; forgetting ventilation; underestimating how much weight a fully wood-clad long van adds; and, the quietly maddening one, sealing wiring or fixings behind a finish you then can't get back into without tearing it off. Leave yourself access, label what's behind each panel, and your future self will thank you.
Matching the lining to how you'll actually use the van
The right lining falls out of how you travel, so picture your real trips, not the dream ones. (And if you're still deciding on the van's bones, like whether to add a pop-top roof, settle that first, since it changes how much wall and ceiling you're even lining.)
- Weekends and fair-weather touring: carpet or felt is plenty. It's quiet, warm, cheap and easy, and the moisture and cleaning downsides barely bite if the van isn't living hard.
- Full-timing or long, back-to-back trips: lean towards wipe-clean surfaces where you cook and wash, and good ventilation everywhere, because you'll generate far more moisture and mess. A felt-and-laminate mix, or wood done properly, ages better here than wall-to-wall carpet.
- Wet sports, mud and dogs: prioritise wipe-clean and quick-drying. Wood or laminate on the lower walls and wet zones, a tough floor, and felt rather than thirsty carpet where you do want fabric. Carpet and a wetsuit are not friends.
- Travelling with children: wipe-clean wins again for the inevitable spills, but you'll also want the soft warmth and quiet of felt or carpet in the sleeping and lounging areas. A mix, as ever.
- Buying with one eye on resale: the design-led, light-wood look currently commands the strongest prices and photographs best, so if you might sell in a few years, a tasteful birch-ply finish is the safe bet, as long as it's executed cleanly with no hidden damp for a savvy buyer to find.
If you're choosing a van's whole interior from scratch rather than just its walls, our look at custom-built versus manufacturer campervans is a useful companion, and if headroom is on your mind, getting the internal height right matters as much as the finish.
The honest verdict
There's no universal best lining, only the right one for how you'll live in the van, so here's the short version.
If you're on a budget, doing it yourself, working around lots of curves, or you just love a soft, warm, quiet cabin, go carpet, and spend the saving on quality material and proper heat-resistant glue. If you want all of that but cleaner, lighter, less dusty and more modern, go felt, which is quietly the smart-money choice and the one we'd lean to for most builds. If looks and resale and a wipe-clean surface top your list, and you'll commit to doing the moisture and ventilation side properly, go wood, knowing you're paying for it in weight, labour and a slightly noisier ride. And if you're like most thoughtful builders, you'll mix all three and put each where it shines.
Whatever you choose, remember the bit nobody tells you: match the lining to what's behind it and to how you'll use the van, ventilate well, and never lay anything straight onto cold metal. Do that, and the surface you touch every day will keep looking and feeling like home for years.
Common questions
What is the best campervan interior lining: carpet, felt or wood?
There is no single best; it depends how you use the van. Carpet is the cosy, forgiving, cheap default; felt is the lighter, cleaner, quietly smart-money middle option; and wood looks best and wipes clean but costs more in weight and labour. Many thoughtful builders mix all three, putting each where it shines, and remember the lining is the last layer, not the strategy.
Is carpet or felt better for lining a campervan?
Both are good, but felt edges it for most builds. Carpet is soft, warm and very forgiving around curves but a touch heavier and dustier. Felt is lighter (around 300 grams per square metre versus carpet's 370), cleaner, at least as quiet, and easy to point to a hard fire certificate. Carpet wins on cosiness and budget; felt on weight, cleanliness and documentation.
How much does it cost to line a campervan interior?
A DIY carpet or felt lining is the cheapest finished result by far: roughly 100 to 225 pounds in material for the walls and ceiling, plus a surprising amount of high-temperature adhesive (budget another 40 to 80 pounds) and a couple of days. Professionally fitted, expect around 575 to 750 pounds for a Transporter-sized van. Beware quotes of 1,200 to 1,900 pounds, which are often full insulate-and-line jobs, not lining alone.
Is a wood-lined campervan a good idea?
It can look superb and wipes clean, which helps resale, but it comes with strings. Tongue-and-groove adds tens of kilos to a long van, eating into a precious 3.5-tonne payload; the labour is the slowest and fiddliest of the three; and you must commit to doing the moisture and ventilation side properly, since wood over poorly managed damp causes trouble. Many builders use thin ply only in hidden areas to claw back weight.
Does the lining affect a campervan's weight and warmth?
Yes, quietly. Carpet and felt add only a few kilos and help with warmth and road noise, while wood cladding can add tens of kilos. More importantly, the lining is the visible skin but how warm and dry the van stays is decided by the insulation behind it, so never lay any lining straight onto cold metal, and ventilate well whatever you choose.
How do I choose a campervan lining for how I use the van?
On a budget, doing it yourself or working around lots of curves, go carpet and spend the saving on quality material and heat-resistant glue. For the same but cleaner, lighter and more modern, go felt, the smart-money choice for most builds. If looks, resale and a wipe-clean surface top your list, and you will do the moisture side properly, go wood, accepting the weight and labour.
The reachable bit
The camper you fall for is rarely the one you can afford. That gap is the whole reason Campervan.win exists. Right now we’re giving away the Sunlight Vanlife, worth around £65,000, and closing that gap is the point: capped entries so the odds stay honest, £10 a ticket, a maximum of five per person, £500 to a UK charity from every full draw, the winner picked by a public randomness beacon anyone can re-check, and one person driving away in the van itself.
Enjoyed this post?
Get more honest campervan guides like this one in your inbox.
You’re in!
Check your inbox. We’ve just sent you a welcome email.

About the author
Martha
Martha writes about interiors, ownership stories, and the everyday realities of campervan life, with a focus on comfort, cost, and how vans are used over time.
Keep Reading
Related Reading
Thoughtful articles that build on what you’ve just read.
Design, Layout & Living Space
8 min read
What is the best colour for a campervan? The honest answer
A practical look at campervan colours: which ones run cooler, hide dirt, hold value and stay safe on the road, and why that moody all-black look is harder to live with than it looks.
Design, Layout & Living Space
9 min read
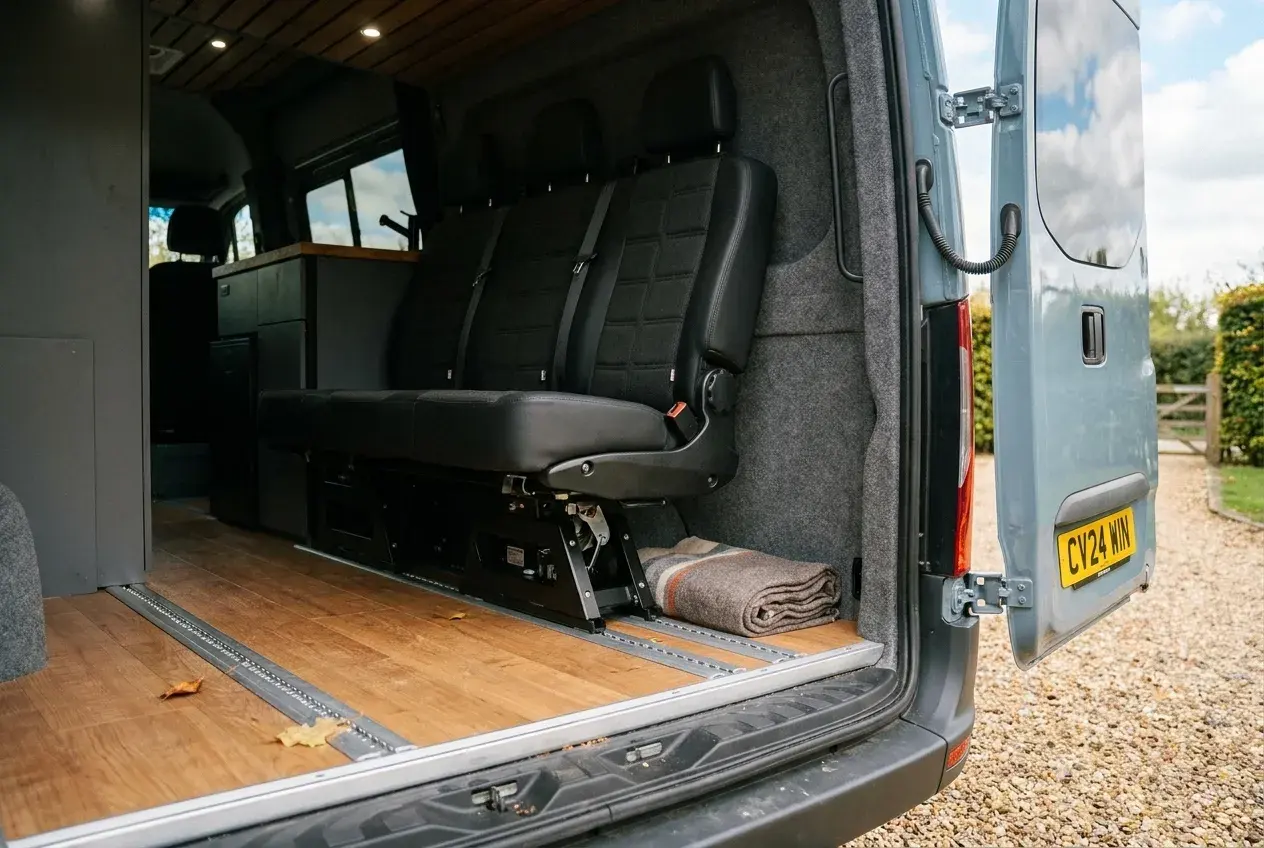
Seats on tracks: why American campervans slide and remove them, and UK ones usually don't
American adventure vans often have rear seats that slide, lock and lift out on floor tracks. UK conversions usually feel more fixed. Here's the honest reason why, and what you can actually get over here.
Design, Layout & Living Space
30 min read
Natural light in a motorhome: how rooflights and windows transform van living
Light is the quiet thing that makes a van feel like a home rather than a metal box. Here is an honest, detailed guide to rooflights, windows, glazing and placement, with real UK numbers and the trade-offs nobody mentions.
Design, Layout & Living Space
20 min read
The clever staircase: how the Sunlight Vanlife 540 lives like a small flat
Most compact campervans force you to choose between a fixed bed and a proper living space. The Sunlight Vanlife 540 refuses the choice with one unusual idea: a permanent staircase up to the bed, which frees the whole rear of the van for a lounge. Here's why it works so well.